
The biggest mistake in wedding photography is treating golden hour as a lucky bonus; it must be treated as a non-negotiable, engineered asset.
- Success depends on proactive timeline engineering and client education, not chance.
- Mastering backlighting and having adaptive strategies for cloud cover are essential technical skills.
Recommendation: Shift from a reactive photographer to a proactive light strategist by building the wedding timeline around the sun’s schedule, not the other way around.
Every wedding photographer knows the feeling: the reception is underway, speeches are running long, and through the window, the sky is exploding in a perfect, warm, golden glow. It’s the light you dream of, the light that makes portfolios sing, and it’s slipping away. The common advice is to “use a golden hour app” or “talk to the couple,” but this advice often fails in the face of a rigid, packed wedding day schedule. It leaves the most magical light of the day to chance, a frustrating experience for both you and your clients who chose you for your beautiful, light-filled work.
The truth is that capturing these iconic portraits isn’t about luck. It’s about strategy. What if the key wasn’t simply hoping for a 15-minute gap, but fundamentally re-engineering the wedding timeline around this critical light asset? The most successful natural light photographers are not just artists; they are solar-schedule strategists. They don’t just capture the day; they build the visual high points of the day by mastering solar math, client education, and adaptive lighting techniques. They know that this light is too valuable to be an afterthought.
This guide will provide a complete framework for moving beyond hope and into strategic execution. We will explore precisely when golden hour occurs and how to plan for it, how to educate and persuade your couples to build their timeline around it, and the specific technical skills needed to maximise every second of that fleeting glow. Finally, we’ll cover the crucial contingency plans for when the weather doesn’t cooperate, ensuring you can create beautiful images no matter what the day brings.
To navigate this strategic approach, we’ve broken down the essential components into a clear roadmap. This article covers everything from the precise timing of golden hour across different seasons to the subtle art of reading and manipulating ambient light for consistently breathtaking results.
Summary: The Strategic Photographer’s Guide to Scheduling and Maximising Golden Hour Portraits
- When Exactly Does Golden Hour Occur in British Summer Versus Winter Weddings
- How to Convince Couples to Adjust Timelines to Capture Golden Hour Portrait Opportunities
- How to Position Couples Relative to Low Sun for Maximum Golden Hour Glow
- The Over-Saturation Mistake That Makes Golden Hour Photos Look Artificially Orange
- When to Abandon Golden Hour Plans Due to Cloud Cover and Use Alternative Light
- Why Garden Ceremony Positioning Relative to Sun Direction Determines Image Quality
- Why Indirect Window Light Creates Better Bridal Portraits Than Direct Sunlight in 90% of Situations
- How to Master Ambient Light Reading for Wedding Photography Without Relying on Flash
When Exactly Does Golden Hour Occur in British Summer Versus Winter Weddings
The first step in any solar-schedule strategy is to abandon guesswork. “An hour before sunset” is a vague rule of thumb, but for a professional, precision is paramount. Golden hour is technically defined as the period when the sun is between 6 degrees above and 6 degrees below the horizon. This specific angle is what produces the soft, warm, diffused light that is so coveted. In the UK, the timing of this window varies dramatically between seasons, directly impacting your timeline engineering.
A summer wedding in June might offer a luxurious, late-evening golden hour that fits perfectly after the wedding breakfast, while a winter wedding in December demands a completely different approach, often requiring portraits to take place in the mid-afternoon. As Adam Mason, a professional photographer, notes, specialised tools are essential for this planning phase. As he explained to The Knot, “Certain phone apps can help you plan where the sun’s going to be exactly related to your position. My favorite app is PhotoPills.” These applications provide precise sunset times for your venue’s exact coordinates, forming the foundation of your schedule.
This table, based on a seasonal golden hour analysis, illustrates how dramatically the timing shifts, a critical factor for initial client consultations.
| Season | Typical Golden Hour Window | Planning Note |
|---|---|---|
| Summer (Jun–Aug) | 7:00–8:30 PM | Longer days give more timeline flexibility |
| Spring (Mar–May) | 5:00–7:00 PM (transitions through season) | Timing shifts noticeably week to week |
| Autumn (Sep–Nov) | 5:30–7:00 PM | Moves earlier; suits early evening ceremonies |
| Winter (Dec–Feb) | 4:00–5:30 PM | Often requires an afternoon ceremony or dedicated portrait slot |
However, even the best app has its limits. A calculator provides the official sunset time for a flat horizon, but it can’t see the mountains, tall buildings, or dense treeline to the west of your portrait spot. This is where your expertise as a strategist comes in. If the terrain blocks the sun, your usable light could end 10-20 minutes earlier than predicted. For open venues like a beach or a flat field, the calculator’s time is more reliable. Scouting the venue in person or using Google Earth to check the western topography is a non-negotiable step in professional timeline engineering.
How to Convince Couples to Adjust Timelines to Capture Golden Hour Portrait Opportunities
Knowing the precise time of golden hour is only half the battle. The real challenge is integrating this “light asset” into a timeline crowded with the priorities of caterers, DJs, and family members. Your role here shifts from photographer to expert consultant. You must educate the couple on the unique value of this specific light, showing them examples from your portfolio that were clearly taken during this time. Frame it not as “stealing them away” from their guests, but as scheduling the 15-20 minutes that will produce their most cherished, epic portraits of the day.
One of the most effective strategies is to propose a “first look” session earlier in the day. This can free up 45-60 minutes of portrait time that would otherwise be consumed during the cocktail hour, creating the flexibility needed to dedicate a slot exclusively to the golden hour. A real-world example from a vineyard wedding timeline shows this in action: facing a late-running ceremony, the pre-scouted location and efficient workflow allowed the team to capture stunning silhouettes and candid moments in a compressed timeframe, proving that planning enables adaptation.
Case Study: Vineyard Wedding Timeline Adaptation
In a late September vineyard wedding, with sunset at 6:45 p.m., the photographer and couple pre-scouted a row of vines with an unobstructed western view. When the ceremony ran 15 minutes late, the team adapted by skipping a planned second location. By using a reflector for fill light and a fast 50mm lens, they successfully captured iconic silhouettes and intimate candid moments as the sun dipped behind the hills, salvaging the session and delivering the desired images despite the timeline compression.
Ultimately, a well-communicated plan is a respected plan. Once the timeline is agreed upon with the couple, it must be shared with all key vendors. This ensures the caterer knows not to serve the main course and the DJ knows not to start the first dance during your critical portrait window. As one photographer advises, the best approach is to build the day around the light from the very beginning.
I recommend planning the ceremony about an hour before golden hour. That way, you’re shooting couples portraits and the guests are taking their own cocktail hour selfies during actual golden hour and sunset.
– Bergreen Photography
Action Plan: Coordinating Vendors for the Golden Hour Window
- Prioritise the Window: Treat the 60 minutes before sunset as the single most important photo opportunity and schedule the couple’s portraits to end at sunset.
- Vendor Communication: Identify and share the final timeline with all vendors (photographer, videographer, caterer, DJ, coordinator, florist, etc.) at least two weeks prior, confirming receipt.
- Build a Buffer: Add 15 minutes of buffer time for each major event block to account for common delays like long speeches or late guest arrivals.
- Incorporate a First Look: Use a first look session to save 45-60 minutes of portrait time post-ceremony, creating crucial flexibility around the cocktail hour.
- Confirm Final Details: A week before the wedding, re-confirm the golden hour plan with the couple and the wedding coordinator to ensure it remains a priority.
How to Position Couples Relative to Low Sun for Maximum Golden Hour Glow
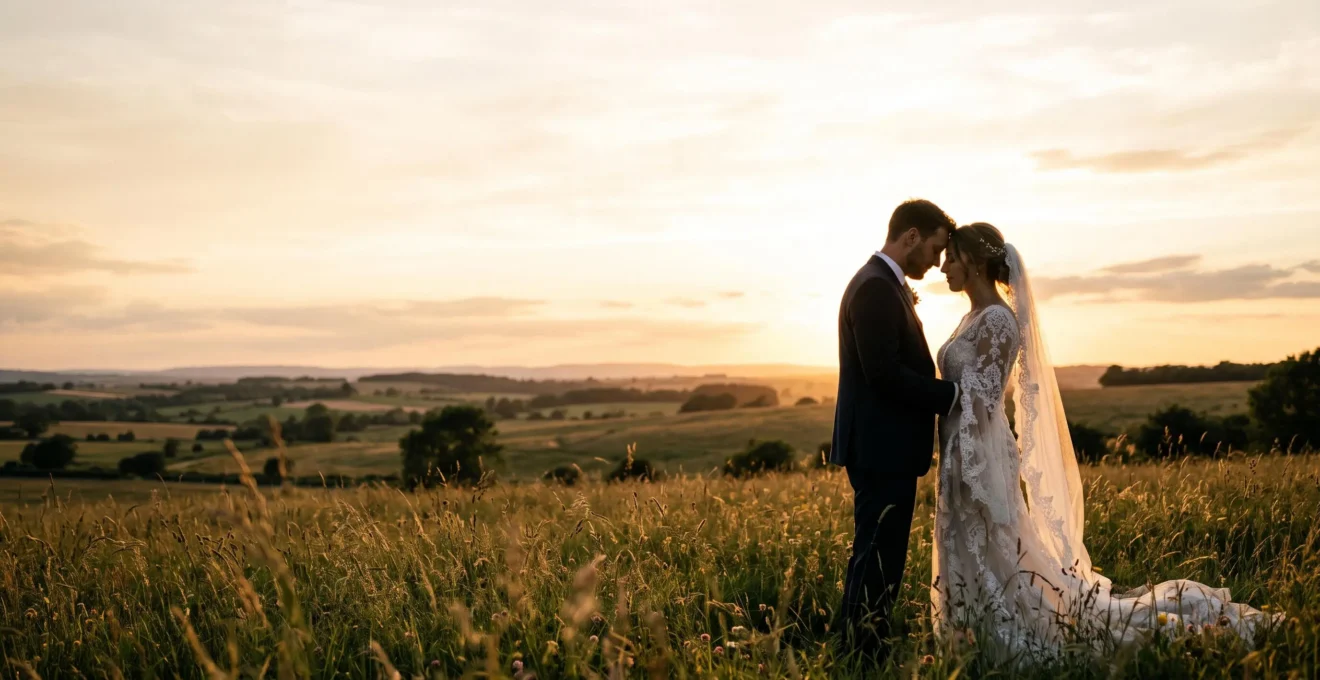
Once you’ve successfully engineered the time, technical execution becomes key. The defining characteristic of golden hour photography is the use of backlighting. Positioning the sun behind your subjects is what creates that magical, glowing “rim light” around their hair and shoulders, separating them from the background and instantly creating a romantic, dreamy atmosphere.
As the image above demonstrates, the magic lies in that halo of light. However, backlighting alone can plunge your subjects’ faces into shadow. The essential tool to counteract this is a reflector. A simple white or gold reflector held by an assistant (or even a willing guest) can bounce that beautiful warm light back onto the couple’s faces, balancing the exposure and creating a soft, flattering illumination. As the Adorama Learning Center explains, the physics are straightforward, confirming that “Shooting with the sunlight behind the subject can illuminate the outline of your model and create soft, shaded light across the face of the subject.”
The light changes incredibly fast during this period, so efficiency is critical. Don’t spend too much time on one static pose. Instead, encourage movement:
- Have the couple walk towards or away from you.
- Prompt a twirl to let the dress catch the light.
- Ask them to interact, whisper, and laugh with each other.
This not only creates more dynamic and authentic images but also allows you to capture a variety of angles and light effects as they move in and out of the sun’s direct path. Using a wider aperture (like f/1.8 to f/2.8) will help maintain focus on the couple while rendering the background into a soft, creamy blur, further enhancing the romantic feel.
The Over-Saturation Mistake That Makes Golden Hour Photos Look Artificially Orange
A common pitfall in golden hour photography is chasing the warmth so aggressively that the final image looks unnatural. The goal is a warm, golden glow, not a monochromatic, artificial orange wash. This mistake often happens in one of two places: in-camera, with an incorrect white balance setting, or in post-production, by pushing the temperature and saturation sliders too far. A truly professional golden hour image retains a sophisticated and balanced colour palette, where warm highlights coexist with cooler, more natural shadow tones.
To avoid this in-camera, avoid using presets like “Cloudy” or “Shade” for your white balance, as they will add excessive warmth. Shooting in RAW and using Auto White Balance (AWB) is often a reliable starting point, as it gives you maximum flexibility in post. Your camera’s AWB is designed to neutralise colour casts, so while it might slightly cool down the scene, it preserves the data needed to bring back the warmth in a controlled way during editing. The key is to aim for a believable warmth, not an overwhelming one.
In post-production, the goal is nuance. Instead of globally increasing the temperature of the entire image, use tools like split toning or colour grading wheels. This allows you to add warmth specifically to the highlights while keeping the shadows neutral or even slightly cool. As seen in the close-up detail above, this technique creates a more cinematic and three-dimensional feel, where the golden light on the skin feels authentic because it’s contrasted by the cooler tones in the deep shadows. This balance is what gives the image depth and prevents the dreaded “fake tan” look, ensuring your portraits remain timeless and elegant.
When to Abandon Golden Hour Plans Due to Cloud Cover and Use Alternative Light
The perfect solar-schedule strategy must include a contingency plan. What happens when you’ve convinced the couple and blocked out the time, only for a thick layer of clouds to roll in? The first rule is: don’t panic and don’t give up immediately. A fully overcast sky acts as a giant softbox, providing beautiful, soft, and even light that is excellent for portraits, even if it lacks the warmth of golden hour.
Furthermore, golden hour can still happen on a partly cloudy day. You should still take the couple out during the planned window. Often, a break in the clouds can occur in the final 30 minutes before sunset, delivering a brief but incredibly dramatic burst of light. Being in position and ready is the only way to capture it. These moments can be even more spectacular than a clear-sky sunset. The key is to keep the session short and efficient, around 15 minutes, to work with whatever light becomes available.
If the sun truly doesn’t appear, your strategy shifts. This is when the light transitions into “blue hour,” the period just after the sun has set. As photographer Haley Rome notes, this is a distinct but equally valuable opportunity: “Golden hour actually starts 30–45 minutes before sunset… Once the sun drops, we enter blue hour — cooler-toned, more moody, and also beautiful.” This cool, soft light is fantastic for creating atmospheric, romantic, and elegant portraits. Embrace the moodiness instead of trying to artificially warm it up in post-production.
Even bad weather can be an asset with the right technique. As one photographer demonstrated on a rainy day, backlighting can be used to dramatic effect. They note that the technique is great in bad weather, explaining that “Backlighting is the perfect way to capture things like rain or to add drama on a dreary day.” By using an off-camera flash or video light as a backlight, you can illuminate the falling raindrops, darken the background, and create a properly exposed, highly atmospheric shot that is far more unique than a standard sunny day portrait. This testimonial from a shoot on an overcast day shows the power of adaptation:
In a rainy, cloudy setting with limited options, the backlight was used to darken the background, bounce off surrounding surfaces to frame the subject, and reflect back onto the couple’s faces to achieve a properly exposed, atmospheric shot.
– Fstoppers, Backlighting: Make Your Portraits Stand Out
Why Garden Ceremony Positioning Relative to Sun Direction Determines Image Quality
A photographer’s strategic thinking about light shouldn’t be confined to the couple’s portraits. The quality of the ceremony photos is determined long before the bride walks down the aisle; it’s determined by where the couple and their guests are positioned relative to the sun. An outdoor garden ceremony with the sun directly in the couple’s faces will result in harsh shadows and squinting. A ceremony with the sun directly behind them can create beautiful backlight, but may leave their faces too dark without careful exposure management.
The ideal scenario for a ceremony is often soft, directional cross-light. This occurs when the sun is positioned to the side of the ceremony space, lighting the couple at a 45-degree angle. This creates gentle, dimensional shadows that define their features without being harsh. This classic technique is known as Rembrandt lighting, a style that “creates a triangle of light using a single light source positioned at a 45-degree angle on the subject’s cheek,” according to the experts at ShootDotEdit. When discussing the venue layout with the couple or coordinator, use a sun-tracking app to determine the sun’s path at the ceremony time and advocate for an altar or seating orientation that will achieve this flattering side-light.
If you have no control over the setup, your two main options are front-lighting or back-lighting. If the sun is behind you (the photographer), it will evenly illuminate the couple, providing a clean, bright look. However, if the sun is low, this can also be harsh. Positioning the couple between you and the sun creates a backlit scene, which can be beautiful for silhouettes and rim lighting but requires you to expose for their faces, potentially blowing out the background. Your choice depends on the creative look you’re after and your confidence in managing high-contrast scenes.
Why Indirect Window Light Creates Better Bridal Portraits Than Direct Sunlight in 90% of Situations
The mastery of natural light extends indoors, especially during the bridal preparation phase. While it might seem intuitive to place a bride in a bright sunbeam for her portraits, direct sunlight is often the worst choice. It creates hard light, characterised by harsh, defined shadows, blown-out highlights on the dress, and unflattering specular highlights on skin. It is difficult to control and rarely produces the soft, elegant look desired for bridal portraiture.
The superior choice, in almost every situation, is indirect window light. A large window on an overcast day, or a window that is not in the direct path of the sun, acts as a giant, natural softbox. It provides a broad, diffused light source that wraps gently around the subject. This soft light minimises harsh shadows, smooths skin texture, and creates a gentle falloff from light to shadow that is incredibly flattering. It has all the beauty of open shade but with a clear directionality that adds depth and dimension.
To use it effectively, position the bride at a 45-degree angle to the window. Have her turn her face slightly towards the light source. This will create that classic “Rembrandt” or “loop” lighting pattern on her face, with a soft shadow on the far side that sculpts her features beautifully. The window provides the key light, and the ambient light in the room acts as a natural fill. By simply moving her closer to or further from the window, and adjusting her angle, you can dramatically change the mood and contrast of the portrait without a single piece of lighting equipment.
Key Takeaways
- Golden hour is a schedulable asset, not a lucky accident. Proactive timeline engineering is the job of the photographer.
- Mastering backlighting with a reflector is the core technical skill for creating the classic golden hour glow.
- A robust plan includes contingencies: use cloud cover as a softbox, embrace the mood of blue hour, or use back-flash in the rain.
How to Master Ambient Light Reading for Wedding Photography Without Relying on Flash
Ultimately, becoming a master of wedding photography is becoming a master of reading ambient light. It’s about walking into any room or outdoor space and instantly identifying the quality, direction, and colour of the available light. It means moving beyond a reliance on flash and learning to shape and modify the light that is already there. The first step is learning to distinguish between the two primary types of light: hard light and soft light.
Hard light comes from a small, intense source (like the direct midday sun) and creates sharp, dark shadows. Soft light comes from a large, diffused source (like an overcast sky or indirect window light) and creates gentle, pale shadows with a soft edge. For portraits, soft light is almost always more flattering as it minimises skin imperfections and wraps beautifully around facial features. A key part of your job is to be a “light hunter,” constantly seeking out pockets of soft light—the shade of a large building, the gentle light under a leafy tree, or the diffused glow from a large north-facing window.
Beyond quality, consider direction. Is the light coming from the front, the side, or the back? Each direction creates a different mood. Side lighting creates drama and texture, while front lighting creates a flatter, brighter look. Backlighting, as we’ve seen, creates silhouettes and rim light. Another advanced technique is using a bright background to create a high-key lighting effect. As ShootDotEdit explains, “The high-key lighting technique involves evenly distributing light on the subject, thereby creating a bright and even background.” This can be achieved by placing your subject in the shade with a very bright, sunlit area directly behind them and exposing for the subject.
Mastering ambient light is an ongoing practice. It requires you to actively observe the world around you, not just on wedding days. Notice how light falls on people in a café, how shadows change throughout the day, and how different surfaces reflect or absorb light. This constant observation builds an intuitive understanding that allows you to make quick, effective decisions in the fast-paced environment of a wedding day, ensuring you create beautiful, naturally-lit images in any situation.
Start implementing this solar-schedule strategy today. Educate your clients, engineer your timelines, and master the techniques to transform your portfolio with consistently stunning golden hour portraits that define your brand.