
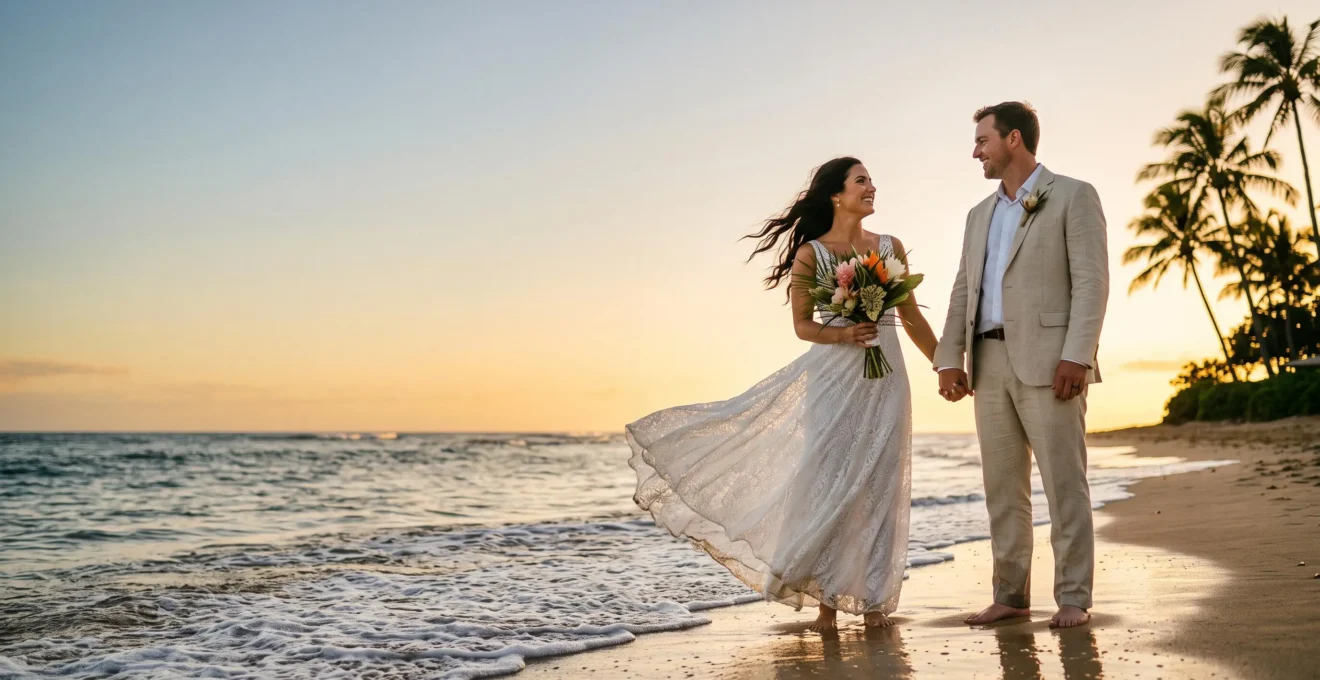
The greatest challenge in tropical beach wedding photography isn’t fighting harsh sun and sand—it’s mastering their predictable physics to create exceptional images.
- Intense equatorial light demands specific exposure and modification techniques, like underexposing and using high-speed sync flash, to avoid blown-out backgrounds and dark subjects.
- Environmental hostility from sand, salt, and humidity requires a proactive gear acclimatization strategy, not just reactive protection, to prevent costly damage.
Recommendation: Shift your mindset from avoiding the elements to controlling them by understanding light physics and implementing a rigorous gear-protection protocol.
For a photographer accustomed to the soft, diffused light of a British afternoon, a tropical beach wedding can feel like stepping onto another planet. The initial euphoria of sun-drenched shores quickly gives way to a harsh reality: blinding light, cavernous shadows, and an environment that seems actively hostile to expensive camera gear. Many photographers arrive armed with generic advice—”shoot at golden hour” or “use a reflector”—only to find these platitudes inadequate against the full force of equatorial sun and corrosive salt spray. They struggle with a frustrating dynamic range compression, where the camera simply cannot capture both the bright, shimmering ocean and the couple’s faces in a single, well-exposed frame.
The common approach is to fight this environment, to seek shade and wait for the sun to drop. But what if this is the wrong strategy? The key to unlocking breathtaking tropical wedding photography isn’t about avoiding the challenges, but about deeply understanding and manipulating them. It’s about treating the intense light, the reflective sand, and the invasive humidity not as random acts of nature, but as predictable variables in a complex equation. This requires a shift in thinking from simple protection to proactive environmental mastery.
This guide moves beyond the surface-level tips. We will deconstruct the physics of tropical light, detail a robust protocol for gear acclimatization, and provide advanced techniques for balancing exposure in the most extreme conditions. By the end, you will have a framework for turning environmental hostility into a creative advantage, ensuring your images are as spectacular as the destination itself.
This article provides a complete roadmap for mastering the unique challenges of tropical beach weddings. Discover how to transform harsh conditions into stunning photographic opportunities with expert strategies and technical insights.
Summary: A Guide to Mastering Tropical Beach Wedding Photography
- Why Tropical Beach Light Creates Exposure Challenges That British Weather Never Presents
- How to Protect Camera Gear From Sand, Salt and Humidity During Tropical Beach Weddings
- Morning Beach Light or Sunset Sessions: Which Timing Creates Better Tropical Wedding Portraits
- The Underexposure Mistake That Creates Dark Subjects Against Bright Tropical Beach Backgrounds
- What Cultural Customs and Local Regulations to Research Before Tropical Beach Destination Weddings
- Why Some Landscape-Integrated Wedding Photos Feel Majestic While Others Make Couples Look Insignificant
- How to Modify Harsh Sunlight With Reflectors and Scrims for Soft Flattering Ambient Wedding Portraits
- How to Integrate Scenic Landscapes Into Wedding Photography Without Diminishing the Couple
Why Tropical Beach Light Creates Exposure Challenges That British Weather Never Presents
The fundamental challenge of tropical light is its intensity and directionality, a world away from the soft, diffused light filtered through British clouds. Near the equator, the sun is higher in the sky for longer, creating harsh, top-down lighting that produces deep, unflattering shadows under eyes and chins (often called “raccoon eyes”). This light isn’t just bright; it’s also highly specular. The vast, light-colored sand acts as a giant, uncontrolled reflector, bouncing light upwards and filling in shadows from below. While this sounds helpful, it often results in flat, characterless lighting that removes dimension from the couple’s faces.
This creates a severe dynamic range compression problem for your camera’s sensor. The scene contains extreme brights (the sky, sunlit water, white sand) and deep darks (the couple in shadow). Your camera’s meter, trying to average this scene, will often suggest an exposure that leaves the background completely blown out or the couple as a dark silhouette. Unlike the forgiving, low-contrast environment of an overcast day, where the light wraps gently around subjects, tropical sunlight forces a choice: expose for the background and lose the subject, or expose for the subject and lose the background. This is the primary reason so many beach wedding photos by inexperienced photographers look amateurish.
Furthermore, the quality of the light is different. The higher concentration of UV light can affect color rendering, often creating a strong blue or cyan cast in shadows and water, which requires careful white balance management both in-camera and in post-production. Mastering the light physics of the tropics means understanding that you’re not just dealing with “more” light, but a fundamentally different type of light that behaves in unique ways.
How to Protect Camera Gear From Sand, Salt and Humidity During Tropical Beach Weddings
The beautiful tropical environment is a minefield of environmental hostility for camera equipment. The three main enemies are sand, salt, and humidity, and they work together to create a perfect storm for gear failure. Fine sand particles, whipped by the wind, are incredibly invasive. They can work their way into lens zoom barrels, focus rings, and even behind button seals, causing grinding sounds and eventual mechanical failure. Salt, carried in the humid sea air, is even more insidious. It deposits as a fine, corrosive layer on every surface, eating away at metal contacts on lenses and hot shoes, leading to communication errors between the camera and lens.
Humidity is the silent killer. When you move a cool, air-conditioned camera into the warm, moist outdoor air, condensation immediately forms on and inside the lens and body. This moisture can short-circuit electronics and foster the growth of fungus on lens elements—a permanent and costly repair. In fact, some industry reports suggest that humidity-related issues account for nearly 30% of all camera repairs originating from tropical regions. This requires a strategy of gear acclimatization. Before shooting, leave your camera bag closed but outside (in a secure, shaded spot) for 30-60 minutes to allow the gear to slowly adjust to the ambient temperature, preventing condensation.
This paragraph introduces the critical challenge of protecting your gear in hostile tropical environments. The following illustration provides a stark, up-close view of the damage that salt and humidity can inflict, making the abstract threat tangible and reinforcing the importance of the protective measures discussed.
As you can see, the crystalline residue is not just a surface-level problem; it actively works its way into the most sensitive parts of your equipment. A simple wipe-down is insufficient. At the end of every shoot day, use a slightly damp cloth to wipe down all camera bodies, lenses, and bags to remove salt residue, followed by a dry cloth. Then, store your gear in a sealed bag or case with desiccant packs to absorb residual moisture. This isn’t optional; it’s the cost of doing business in paradise.
Your Action Plan: Sandproofing Your Gear
- Lens Choice: Favor fixed-focal-length (prime) lenses. Their sealed construction is less vulnerable to sand than the telescoping mechanisms of zoom lenses.
- Seal the Zoom: If you must use a zoom, fit a tight rain sleeve over the entire lens and body. This acts as a barrier against both sand and salt spray.
- Lens Change Protocol: Never change lenses on the beach. The open camera body is a magnet for sand and salt. Retreat to a sheltered space like a car or indoor room for any swaps.
- Low-Angle Strategy: Avoid placing your camera directly on the sand. Use a ground pod, a small sled, or even your camera bag to create a buffer for low-angle shots.
- Active vs. Idle: When not actively shooting, keep the lens cap on and the camera secured in a closed bag. Do not let it hang from your neck where it can be exposed to wind-blown sand.
Morning Beach Light or Sunset Sessions: Which Timing Creates Better Tropical Wedding Portraits
The “golden hour” is a universally cherished time for photographers, but in the tropics, its character and utility differ. A common debate is whether the morning or evening golden hour is superior for beach portraits. Morning light, just after sunrise, is often clearer and crisper. The air is typically less hazy, and the beaches are less crowded, offering a more serene and private setting for the couple. The light angle is low, creating long, soft shadows and a beautiful, warm glow. However, scheduling a bride and groom for a 6 AM photo session on their wedding day is a significant logistical challenge.
The sunset session is the more traditional and practical choice. The light is equally beautiful, transitioning from a warm, golden hue to soft pinks and purples. It allows you to create dramatic silhouette shots against a vibrant sky. However, the sunset golden hour can be more unpredictable. Afternoon clouds can roll in, obscuring the sun, and you are racing against a hard deadline: once the sun sets, the light disappears rapidly. It’s crucial to understand the timing. A study of beach lighting windows shows the Golden Hour offers a 1-2 hour window before sunset, while Blue Hour lasts only 20-30 minutes after.
The optimal strategy is often to plan for both. A “split session” can yield a much more diverse gallery. Start the main couple’s portrait session during the last 30-45 minutes of the golden hour to capture those classic, warm, romantic images. Then, as the sun dips below the horizon, you transition into the “blue hour.” This brief window offers a deep, moody, and highly saturated light that is perfect for dramatic, cinematic portraits. By planning to use both lighting scenarios, you provide the couple with a rich visual story that captures the full spectrum of the tropical evening’s beauty.
The Underexposure Mistake That Creates Dark Subjects Against Bright Tropical Beach Backgrounds
When faced with a bright beach scene, a photographer’s natural instinct might be to expose for the couple’s faces, ensuring they are not in shadow. This is a critical mistake. When you “expose for the subject,” your camera’s light meter will dramatically increase the shutter speed or close down the aperture to correctly render their skin tones. The consequence? The already-bright background—the sky and water—becomes completely overexposed, turning into a vast, textureless white expanse. You’ve saved the subject but killed the environment, defeating the purpose of a destination wedding photo.
The professional technique is counter-intuitive: you must intentionally underexpose the ambient light. By setting your exposure for the background, you retain the rich blues of the sky and the texture of the clouds. This will, of course, plunge your couple into near-silhouette. This is where you take control. Instead of relying on passive reflectors, you must introduce your own light source—typically an off-camera flash or strobe—to illuminate the couple and balance the exposure. This technique is often referred to as “overpowering the sun.”
To do this effectively, you need to use High-Speed Sync (HSS) flash. Normally, your camera has a maximum shutter speed (the “sync speed,” often 1/200s or 1/250s) at which it can use flash. This is far too slow to underexpose the bright sun. HSS allows your flash to pulse rapidly, enabling you to use much faster shutter speeds (1/1000s, 1/4000s, or even higher). This lets you select a wide aperture (like f/2.8) for a blurry background while simultaneously using a fast shutter speed to control the bright ambient light, and then filling in the couple with perfectly balanced flash. A case study from a pro photographer shows the power of this method, where shooting at 1/320s, f/4, ISO 250 with HSS flash through a scrim created a perfectly balanced portrait where the ambient sun was controlled and the subjects were beautifully lit.
What Cultural Customs and Local Regulations to Research Before Tropical Beach Destination Weddings
Technical skill is only half the battle in destination wedding photography. Arriving in a new country without doing your homework on local customs and regulations can lead to awkward situations or even legal trouble. Your role as a destination specialist extends beyond the camera; you must also be a culturally aware and responsible visitor. The first area of research is always legal and logistical. Do you need a special work visa or permit to photograph a wedding professionally? Many countries have strict rules to protect their local workforce, and simply arriving on a tourist visa can put you at risk of fines or deportation. Furthermore, many popular beaches, especially those within national parks or protected areas, require specific photography permits, often with fees and restrictions on where and when you can shoot.
Beyond the legal framework, understanding cultural nuances is crucial for building rapport and showing respect. Research local customs regarding dress code, public displays of affection, and social etiquette. In some conservative cultures, a revealing wedding dress might be acceptable at a private resort but draw unwanted attention on a public beach. Knowing how to greet people in the local language, even if it’s just a simple “hello” and “thank you,” goes a long way. This respect should extend to your interactions with local vendors and resort staff, who can be invaluable allies during the wedding day.
Finally, your research should include environmental regulations. Is the beach a nesting ground for sea turtles? Are there protected dunes you cannot walk on? Being a responsible photographer means practicing “Leave No Trace” principles. This includes not moving or disturbing natural elements for a photo, packing out everything you bring in, and educating your clients on the importance of respecting the fragile ecosystem. A photographer who demonstrates this level of preparedness and respect not only ensures a smooth shoot but also elevates their professional standing.
Why Some Landscape-Integrated Wedding Photos Feel Majestic While Others Make Couples Look Insignificant
One of the primary reasons couples choose a destination wedding is for the epic scenery. As a photographer, your job is to capture this, but there’s a fine line between a majestic environmental portrait and a photo where the couple is lost in a beautiful but overwhelming landscape. This problem is one of scenic dominance, where the grandeur of the environment accidentally diminishes the importance of the subjects. The difference between success and failure often comes down to two elements: scale and connection.
A successful wide shot uses compositional tools to intentionally guide the viewer’s eye to the couple, even if they are small in the frame. Techniques like using leading lines (the curve of the shoreline, a path in the sand) to point directly to the couple can make them the focal point. The rule of thirds is also critical; placing the small figures of the couple at a power point in the frame, rather than dead center, gives them compositional weight. Color can also play a role. A bride in a white dress will naturally stand out against a backdrop of blue water and green palms, creating a point of high contrast that draws the eye.
This wide, environmental shot masterfully illustrates the concept of using scale to evoke majesty. The couple is intentionally small, but their placement and the composition of the landscape make them the undeniable anchor of a vast, breathtaking scene.
The feeling of connection is more subtle. Even in a wide shot, the couple’s pose and interaction are vital. A couple holding hands, looking at each other, or sharing a kiss creates a human moment that grounds the epic scenery with emotion. Without this connection, they can appear like static props placed in a landscape. The majestic photo tells a story: “Here are two people in love, and this incredible landscape is the setting for their story.” The insignificant photo simply says, “Here are two people standing in front of a nice view.” The difference is profound.
How to Modify Harsh Sunlight With Reflectors and Scrims for Soft Flattering Ambient Wedding Portraits
While HSS flash is the ultimate tool for controlling light, sometimes you need a more subtle, natural-looking solution, especially for classic portraits. This is where light modifiers like reflectors and scrims become indispensable. However, using them effectively in the tropics requires a different approach than on a cloudy day. The most common mistake is using a silver or gold reflector in direct, harsh sun. This creates a blinding, specular light that is just as harsh as the sun itself, making the couple squint and producing an unnaturally “lit” look. In bright sun, the goal is subtraction and diffusion, not just reflection.
The most valuable tool in your kit should be a large scrim (also known as a diffuser). A scrim is essentially a piece of translucent fabric stretched over a frame. When held between the sun and your couple, it doesn’t block the light but instead diffuses it, transforming the harsh, direct sunlight into a large, soft, beautiful light source. It’s like creating your own personal cloud. This allows you to achieve that soft-light look even at high noon. As wedding photographers Jeff and Erin Youngren note, this is a priority for their style. In an article on their techniques, they state:
Our style is focused on clean, fresh, creamy skin tones, so we’re always looking for ways to create soft, even light.
– Jeff and Erin Youngren, The Youngrens – How to Shoot Beautiful Portraits in Harsh Sunlight
The visual below shows a scrim in action. Notice how it takes the direct, harsh sunlight and turns it into a soft, flattering light source, eliminating hard shadows and allowing the couple to have natural, relaxed expressions. This is the key to creating beautiful ambient light portraits in challenging conditions.
When you do need to use a reflector, opt for the white side. It provides a clean, neutral fill light that is much softer and more natural than a silver reflector. A great technique is to place the couple with their backs to the sun (which creates a natural hair light) and use a large white reflector in front of them to gently bounce light back into their faces, filling in the shadows. This combination of backlighting and soft fill is a classic portrait technique that works beautifully on the beach.
Key takeaways
- Mastering tropical beach photography is about controlling the physics of the environment, not just fighting the harsh elements.
- Intentionally underexposing the ambient light and using High-Speed Sync flash is the core technique to balance a bright background with a well-lit couple.
- A proactive gear acclimatization and protection protocol (against sand, salt, and humidity) is non-negotiable to prevent costly damage.
How to Integrate Scenic Landscapes Into Wedding Photography Without Diminishing the Couple
Beyond the epic wide shot, integrating the landscape into your wedding photography means using the environment as an active storytelling element, not just a passive backdrop. This involves moving beyond the “couple in front of a view” formula and finding creative ways to weave the textures, colors, and character of the tropics into your compositions. It’s about telling a richer, more detailed story of the couple’s experience in that specific place.
One powerful method is to use environmental elements as framing devices or foreground interest. Shooting through the leaves of a palm frond can create a natural, soft vignette that adds a sense of intimacy and place. Incorporating textures like driftwood, seashells, or the patterns of rippling water in the foreground adds depth and a tactile quality to the image, making it more immersive. Look for natural light and shadow play; the hard shadows cast by palm trees can be used to create bold, abstract, and modern compositions that are unique to that time and place.
As photographer Christina Craft explains, being in a challenging environment can spark creativity. She notes in an interview on beach wedding challenges: “It forces me to think more creatively, so I always bring a variety of small accessories… to create a lot of variety in one setting.” This mindset is key. Think about incorporating cultural or thematic details that are part of the wedding story. A close-up of the couple’s hands showing off a tropical lei or intricate henna designs, with the ocean blurred in the background, tells a story of both the place and the event. Including playful, authentic moments of the couple or their guests actually interacting with the environment—splashing in the water, building a sandcastle with their kids—reinforces the beach as a lived-in story setting rather than a static postcard.
To consistently produce stunning tropical wedding photography, move beyond simple problem-solving and adopt a holistic strategy of environmental mastery. This begins with understanding the physics of light and ends with a deep respect for the location’s culture and ecosystem. Evaluate your current gear and techniques against this professional standard to identify areas for growth.