
In summary:
- Master sun direction by positioning the couple at a 45-degree angle to the light source to create flattering, dimensional shadows.
- Seek out “open shade” from buildings or large trees to find soft, diffused light that eliminates harsh shadows on faces.
- Control busy botanical backgrounds by using telephoto lens compression, natural framing, and a shallow depth of field.
- Avoid accidental silhouettes in backlit scenes by using spot metering on the subject’s face to achieve a correct exposure.
- Actively modify harsh midday sun using scrims to diffuse light and reflectors to fill in shadows for professional results.
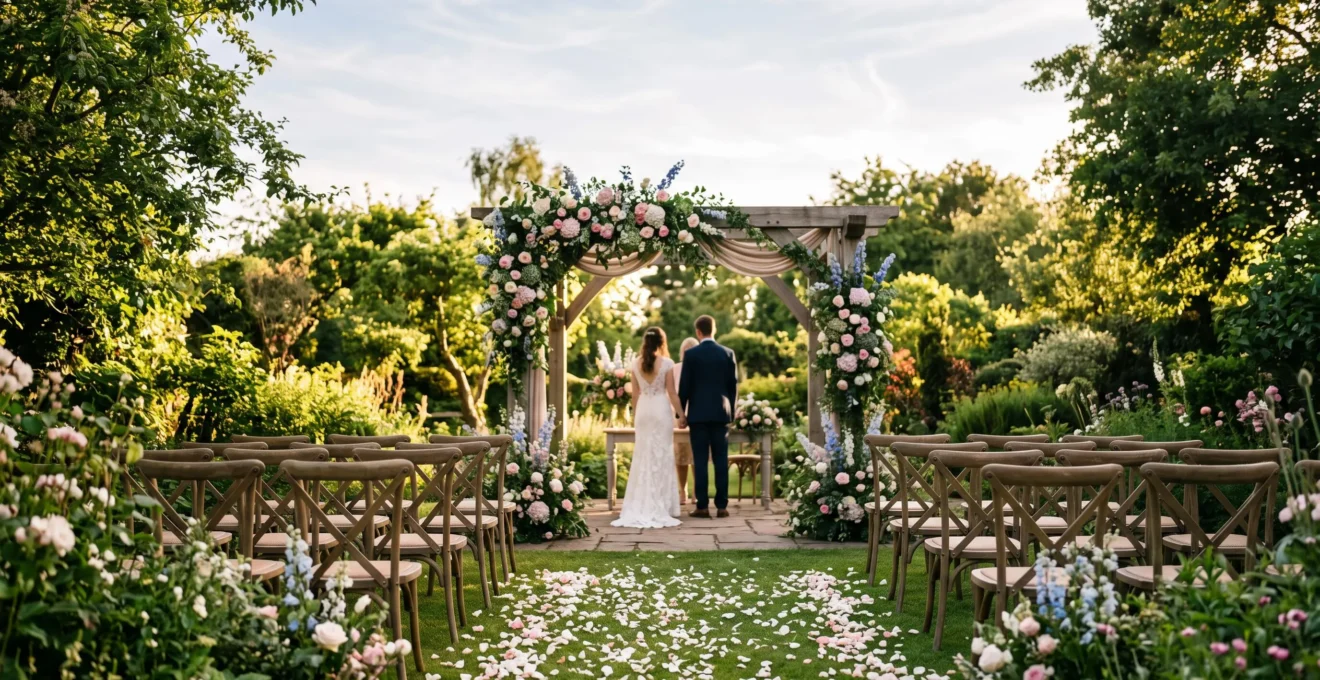
The dream of a garden wedding—a ceremony bathed in golden light, surrounded by lush florals and vibrant greenery. For a wedding photographer, this idyllic vision can quickly turn into a technical nightmare. Harsh, dappled sunlight creates unflattering shadows, vibrant foliage becomes a distracting, chaotic background, and the perfect natural light promised by the great outdoors proves frustratingly elusive. Most photographers know the basic advice: “find some shade” or “use a wide aperture.” But in the complex and unpredictable environment of a garden, these platitudes are often not enough.
What if the key wasn’t simply to avoid the garden’s challenges, but to actively master them? The true art of botanical wedding photography lies in transforming the environment from a source of problems into a powerful toolkit. It’s about learning to read the sun’s path, to see trees not just as background but as natural light diffusers, and to compose order out of botanical chaos. This guide moves beyond the basics, offering a specialist’s approach to light sculpting and environmental control. We will deconstruct the specific challenges of garden ceremonies and provide the techniques needed to not just cope with them, but to harness them for breathtaking images.
This comprehensive article will explore the core strategies for mastering outdoor ceremonies. We will cover everything from the crucial importance of sun positioning and finding quality shade to taming busy backgrounds and mastering tricky backlighting. By the end, you’ll be equipped with a new way of seeing and shooting in any garden setting, ready to create the beautiful, naturally-lit images your clients envision.
Summary: How to Photograph Garden Wedding Ceremonies With Beautiful Natural Light and Botanical Surroundings
- Why Garden Ceremony Positioning Relative to Sun Direction Determines Image Quality
- How to Find and Use Open Shade in Garden Ceremonies for Soft Flattering Portrait Light
- How to Manage Busy Garden Backgrounds Without Losing Environmental Context
- The Backlighting Mistake That Creates Silhouettes During Garden Ceremonies
- When to Advise Garden Ceremony Contingency Plans for British Weather Unpredictability
- How to Modify Harsh Sunlight With Reflectors and Scrims for Soft Flattering Ambient Wedding Portraits
- How to Scout Scenic Landscape Viewpoints Within 10 Minutes of Wedding Venues
- How to Schedule and Maximise Golden Hour for Romantic Wedding Couple Portraits
Why Garden Ceremony Positioning Relative to Sun Direction Determines Image Quality
The single most impactful factor in outdoor ceremony photography is not your camera or lens, but the couple’s position relative to the sun. Many photographers and planners overlook this, but the direction of light dictates everything from skin tones to background separation. Flat, direct front-lighting eliminates shadows, which sounds good in theory but results in a lack of depth and dimension. Conversely, placing the sun directly behind the officiant often forces the couple to squint and creates harsh “raccoon eyes” shadows. The goal is to create soft, modeling shadows that define facial features without being distracting.
The solution lies in what is often called “Rembrandt lighting,” adapted for an outdoor setting. The ideal position is to have the sun coming in at approximately a 45-degree angle to the couple. This angle creates a gentle fall-off of light across their faces, sculpting their features and adding a three-dimensional quality to the image. As WedPicsQR’s editorial team notes in their lighting guide, you should “Put subjects at a 45-degree angle to the light for flattering shadows.” This small adjustment can be the difference between a flat snapshot and a professional portrait.
When setting up for the ceremony, prioritize the more flattering light for the bride’s face. This may mean you need to position yourself on one side of the aisle more than the other. Start with the sun positioned to the side and experiment with the exact angle. This simple act of orienting the ceremony setup based on the sun’s path is the first and most critical step in achieving high-quality garden wedding photos. It establishes a foundation of good light that all other techniques will build upon.
How to Find and Use Open Shade in Garden Ceremonies for Soft Flattering Portrait Light
When the 45-degree sun angle isn’t possible, or when you’re shooting portraits during the harsh midday sun, the next best tool is “open shade.” However, not all shade is created equal. The mistake many photographers make is seeking refuge under a tree, only to find themselves battling dappled, patchy light that creates distracting hot spots on the couple’s skin and clothing. True open shade provides a large, even, and soft light source, creating the effect of a giant softbox in the sky.
Look for the shade cast by a building, a solid wall, or a very dense, large group of trees where the light is uniform. The key is to position your subjects just inside the edge of this shade, facing out towards the open, bright sky. The sky itself becomes the main light source, filling in shadows beautifully and creating a soft, flattering glow on the skin. As an Aftershoot editorial contributor mentions, a common professional practice is to “shoot my portraits in the day using natural light with backlighting or open shade.” This technique is a cornerstone of natural light photography because it consistently delivers beautiful results.
The goal is to achieve diffused lighting, which creates a romantic and even effect on skin tones. Here are some key considerations when using open shade:
- Seek diffused lighting: This creates the most soft, even, and romantic effect on skin tones for intimate ceremony moments.
- Find the right source: True diffusion comes from natural open shade, or by modifying light with a softbox or scrim.
- Watch for unevenness: Always be on the lookout for patchy light from leaves or other objects, which creates distracting shadows and highlights across the frame.
By learning to identify and utilize quality open shade, you gain control over even the harshest lighting conditions, ensuring your portraits are always soft, luminous, and professional.
How to Manage Busy Garden Backgrounds Without Losing Environmental Context
A garden’s beauty is also its biggest challenge: the sheer volume of visual information. Flowers, trees, leaves, and structures can create a “busy” background that distracts from the main subjects. The common advice is to use a wide aperture (like f/1.8) to blur the background into oblivion. While this can be effective, it often erases the very reason the couple chose the venue. The goal isn’t to eliminate the garden, but to manage the “structured chaos” and make the environment a complementary part of the story.
One of the most powerful techniques for this is lens compression. By using a longer focal length (e.g., 85mm, 135mm, or 70-200mm) and moving further away from your subjects, you can compress the distance between them and the background. This makes the background elements appear larger and closer, but also flattens the scene in a pleasing way, allowing you to create a more painterly and less chaotic backdrop while still retaining its character.
Another key strategy is to actively look for natural frames within the garden. Shoot through an archway of roses, use the overhanging branches of a willow tree to frame the top of your image, or place the couple between two distinct rows of hedges. These elements create a frame-within-a-frame, which naturally draws the viewer’s eye to the subject while embedding them beautifully within their surroundings. Similarly, look for leading lines—pathways, streams, or rows of flowers—that you can use to guide the eye directly to the couple. By imposing a clear compositional structure onto a complex scene, you bring order to the chaos without sacrificing the environmental context.
The Backlighting Mistake That Creates Silhouettes During Garden Ceremonies
Backlighting during a garden ceremony can create a magical, glowing rim light around the couple, separating them from the background. However, it’s also the easiest way to make a critical mistake: creating an accidental, underexposed silhouette. This happens because your camera’s default metering mode (Matrix or Evaluative) sees the bright sky behind the couple and tries to expose for the entire scene. In doing so, it determines that the couple in the foreground is just a dark shadow and exposes them as such, losing all facial detail.
To avoid this, you must take control of your camera’s meter by switching to spot metering mode. As the PictureCorrect editorial team explains, “This mode allows you to meter a very small part of your frame.” It tells your camera to base its entire exposure calculation on a tiny, specific point that you choose. By placing this point directly on the bride or groom’s face, you are telling the camera, “This is the most important part of the image; make sure *this* is properly exposed.” The camera will then adjust its settings accordingly, brightening the couple and often letting the background become overexposed, which is a perfectly acceptable and often desirable effect in backlit portraits.
This allows you to capture the beautiful rim light without losing the crucial details of your subjects’ faces and expressions.
The image above illustrates the difference. A flat silhouette loses all emotion, while a properly exposed backlit portrait retains facial detail while being enhanced by a beautiful halo of light. Mastering this one technique will fundamentally change your backlit photography.
Your Action Plan: Spot Metering to Avoid Silhouettes
- Switch your camera to spot metering mode before positioning the couple against the bright backlit background.
- Point the focal point directly at the subject’s face or skin, then take a meter reading from that small area only.
- Adjust your exposure settings based on an authoritative guide to spot metering until the subject reads correctly, accepting that the background may become overexposed.
- Shoot in RAW format so the brighter background can still be recovered or adjusted afterward in post-production.
When to Advise Garden Ceremony Contingency Plans for British Weather Unpredictability
Photographing in the UK means accepting that the weather is the one wedding guest you can’t control. For a garden ceremony, this unpredictability requires a proactive approach. It’s crucial to have a conversation with the couple well in advance about a contingency plan. This isn’t about being negative; it’s about being a prepared professional who can deliver beautiful images no matter the conditions. Often, overcast or even rainy days can produce more stunning and unique photos than a day with harsh, direct sun.
As Morina Photography points out, “Overcast conditions diffuse natural light, eliminating harsh shadows and creating a flattering, soft glow on the skin.” This is essentially nature providing a giant, free softbox. A rainy day also saturates colors, making the greens of the garden more vibrant and the floral hues pop. One photographer’s first-hand experience captures this perfectly: “After it rains, the colors are insanely BRIGHT and VIBRANT!” Embracing the rain, rather than fearing it, opens up creative possibilities. A back-flash can be used to illuminate individual raindrops, creating a magical, glowing effect that couples love.
A solid contingency plan involves both logistics and attitude. Your role is to approach any hesitant couple with positivity, reassuring them that you have the skills and tools to create something beautiful. A few key action steps, based on advice from publications like SLR Lounge for rainy day weddings, include:
- Advise the couple to keep stylish umbrellas on hand and have their hair and makeup artist available for touch-ups.
- Protect your gear with weather-sealed lenses, dedicated rain sleeves, or even improvised plastic bags.
- Approach the situation with a collaborative, positive attitude, showing excitement for the unique creative opportunities.
By preparing for the worst, you can often create the best, most memorable images of the day.
How to Modify Harsh Sunlight With Reflectors and Scrims for Soft Flattering Ambient Wedding Portraits
Sometimes, you can’t move the ceremony, and there’s no open shade to be found. When you’re forced to shoot in harsh, direct sunlight, you don’t have to surrender to unflattering shadows. This is where you transition from simply *finding* good light to actively *creating* it. Portable light modifiers like 5-in-1 reflectors and scrims are the garden photographer’s best friends. A large scrim (a translucent fabric panel) held between the sun and the couple can transform direct, hard light into a large, soft, and flattering source. As the SLR Lounge team notes, with this simple tool, “What was a hard, unflattering light source becomes a large, soft key light.”
A 5-in-1 reflector offers even more versatility. The internal scrim provides the diffusion mentioned above, with most expecting about a one-stop softening effect. The other surfaces allow you to bounce and shape the existing light. You can place the silver side at waist height to kick a bright, contrasty fill light back into your subjects’ faces, or use the white side for a more subtle, neutral fill. Understanding how to use these surfaces allows you to sculpt the light with precision.
The following table, based on a comparative analysis of reflector types, breaks down the best uses for each surface in a garden setting.
| Reflector Side | Light Quality Produced | Best Use Case in Garden Settings |
|---|---|---|
| Silver | Bright, high-contrast reflected light | Adding drama, definition, and extra fill in harsh outdoor light |
| Gold | Warm, sun-kissed tone | Enhancing golden hour warmth, best avoided on very pale skin |
| White | Soft, neutral fill | Gentle shadow-lifting without altering skin tone |
| Black | Absorbs light, deepens shadow | Creating defined contours and negative fill for sculpted portraits |
According to a practical guide from Behind the Shutter, you can even hold the silver side overhead to throw directional light and create a bright catchlight in the eyes. Mastering these modifiers means you are never truly at the mercy of the available light.
How to Scout Scenic Landscape Viewpoints Within 10 Minutes of Wedding Venues
While the ceremony location is fixed, the best portrait spots often are not. Part of providing a premium service is finding those breathtaking, scenic viewpoints that add epic scale and variety to the couple’s wedding gallery. The challenge is time. On a wedding day, you can’t afford to wander for an hour. Your scouting process must be ruthlessly efficient, identifying prime locations within a 5-to-10-minute walk or drive from the main venue.
This “predictive scouting” begins before you ever set foot on the property. Use digital tools to do the heavy lifting. Google Earth and Google Maps’ satellite view are invaluable for identifying promising features from above. Look for clearings, interesting tree formations, small bodies of water, or elevated points with a clear view of the sunset. You can even use Street View to “walk” the roads around the venue to check for accessible fields or scenic overlooks.
Once you’ve identified potential spots digitally, use an app like PhotoPills or Sun Seeker on your phone. These tools use augmented reality to show you the precise path of the sun at any given time of day. This allows you to predict exactly where the golden hour light will fall, turning your scouting from guesswork into a precise planning exercise. When you arrive on-site, you’re not searching aimlessly; you’re simply confirming the 2-3 high-potential spots you’ve already identified, checking for accessibility and confirming the quality of light. This entire process can be done in minutes, yet it adds immense production value to the final images.
Key takeaways
- The direction and quality of light are more important than any piece of gear. Master sun angle first.
- Not all shade is equal. Learn to identify “open shade” for soft, beautiful, and consistent portrait lighting.
- Control busy backgrounds with thoughtful composition—using lens compression, framing, and leading lines—instead of just blurring them away.
- When you cannot find good light, you must create it. Scrims and reflectors are essential tools for sculpting sunlight.
How to Schedule and Maximise Golden Hour for Romantic Wedding Couple Portraits
Golden hour is the “magic hour” for a reason. The hour before sunset (and after sunrise) provides light that is soft, warm, directional, and incredibly flattering. For a garden wedding, this is the ultimate payoff. The low-angled sun streams through trees and flowers, creating long, romantic shadows and a dreamy, golden glow. To maximize this fleeting opportunity, it must be explicitly scheduled into the wedding day timeline.
Work with the couple and their planner to block out a dedicated 20-30 minute window for portraits during this time. Often, this means “stealing” the couple away between the main course and dessert. A helpful checklist for garden weddings suggests scheduling the ceremony itself one to two hours before sunset to ensure vows are exchanged in beautiful light. During venue visits, you should document how different areas look at this time of day, creating a shot list for the golden hour session. The goal is to move quickly and efficiently from one pre-selected spot to another.
This is the perfect time to employ backlighting. As the Aftershoot editorial team explains, during golden hour, “the main light source is positioned behind the subject, often creating a glowing rim light.” With the sun low in the sky, you can easily position it behind the couple to create that beautiful halo effect without the harsh contrast of midday backlighting. Use your spot meter on their faces, and let the warm, golden light do the rest.
The result of this planning is not just a few extra photos, but the iconic, epic, and romantic portraits that often become the couple’s favorite images of the entire day. It’s a small investment of time in the schedule for an enormous creative return.
Armed with these techniques, you’re now equipped to transform any garden venue from a challenge into a creative playground. Start implementing this strategic approach to light and composition to confidently deliver the breathtaking botanical wedding photos your clients dream of.