
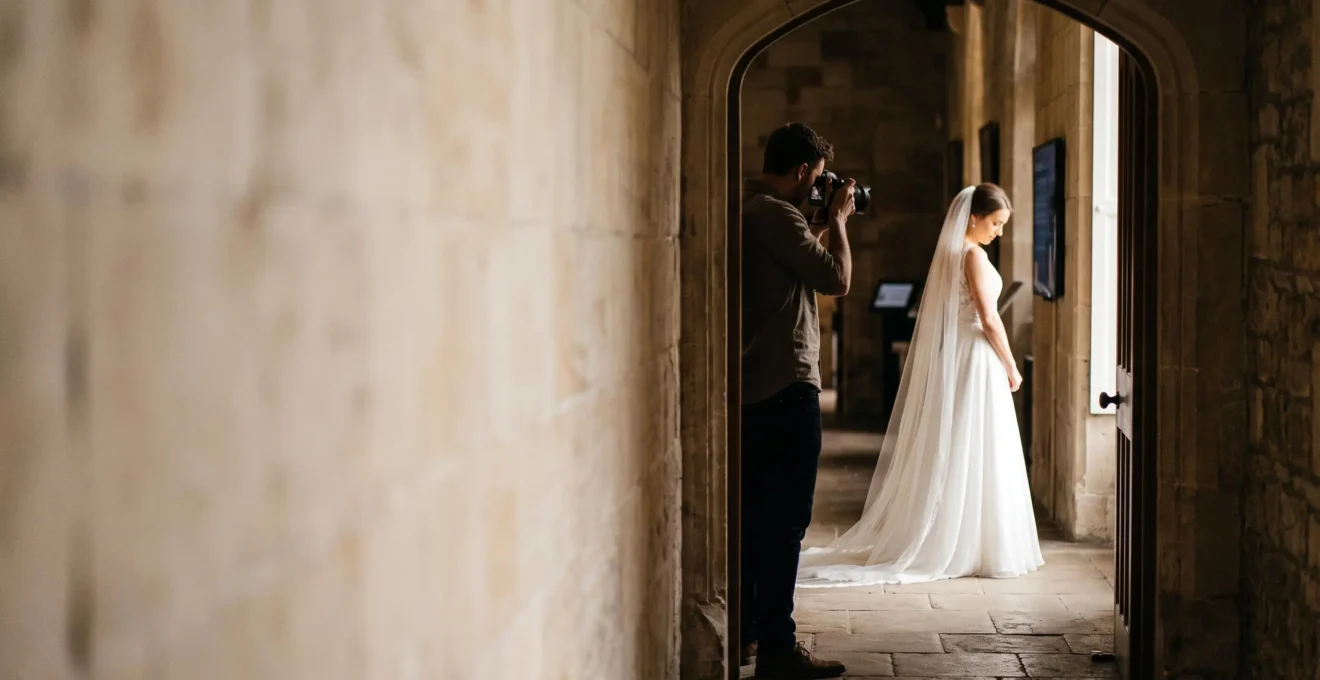
Mastering ambient light has little to do with your camera settings and everything to do with learning to diagnose light quality like an expert.
- Bad light isn’t a problem to be fixed with flash; it’s a symptom to be diagnosed by assessing its direction, color quality (CRI), and hardness.
- The most common errors, like missed focus at wide apertures, stem from technical misunderstandings, not a lack of light.
Recommendation: Stop thinking about “finding good light” and start training your eye to assess, modify, or subtract any light source a wedding day throws at you.
The moment a wedding planner says, “The venue has a strict no-flash policy,” is a moment of quiet panic for many photographers. The immediate instinct is to reach for a faster lens or crank the ISO, treating the situation as a technical problem of light quantity. We’ve all been taught the basics: use fast primes, watch your shutter speed, and hope for the best. But this approach is a reactive scramble, a gamble against noise and motion blur. It misses the fundamental point of working with available light.
The true mastery of ambient light photography isn’t about surviving its absence; it’s about understanding its presence. It’s about developing an observational skill set that allows you to walk into any room—a sun-drenched bridal suite, a tungsten-lit ballroom, or a historic, dark church—and instantly diagnose the light. What is its quality? Its color? Its direction? This isn’t just about finding a window; it’s about understanding why that window light is soft and how to shape it into a classic Rembrandt pattern. It’s knowing that some ambient light, like cheap DJ LEDs, is a form of color contamination that must be controlled.
But what if the real key wasn’t about your gear, but about your eye? What if you could learn to read the light, modify it, and even subtract it to create stunning, natural-looking portraits in situations where you previously would have reached for a flash? This guide is built on that premise. We will move beyond the simple exposure triangle and into the world of light quality assessment, giving you a framework to confidently handle any ambient lighting scenario, turning a “no-flash” restriction into a creative advantage.
This article provides a structured approach to reading and manipulating light. We will explore everything from shaping perfect window light to taming harsh sun, diagnosing color problems, and knowing precisely when the ambient-only approach has reached its limit.
Summary: A Photographer’s Guide to Reading and Mastering Ambient Light
- Why Indirect Window Light Creates Better Bridal Portraits Than Direct Sunlight in 90% of Situations
- How to Modify Harsh Sunlight With Reflectors and Scrims for Soft Flattering Ambient Wedding Portraits
- Tungsten Ballrooms or LED Uplighting: Which Ambient Light Sources Create the Worst Colour Casts on Skin
- The Wide Aperture Mistake That Causes Missed Focus When Shooting Ambient Light in Bright Venues
- When to Abandon Ambient Light and Introduce Flash as Reception Venues Transition From Dusk to Dark
- How to Photograph Dark Historic Church Interiors Without Flash or Tripod
- How to Find and Use Open Shade in Garden Ceremonies for Soft Flattering Portrait Light
- How to Schedule and Maximise Golden Hour for Romantic Wedding Couple Portraits
Why Indirect Window Light Creates Better Bridal Portraits Than Direct Sunlight in 90% of Situations
The most common mistake photographers make with window light is placing the subject directly in a patch of sun. While it provides ample light, direct sun is a hard, high-contrast source. It creates harsh shadows, emphasizes skin imperfections, and causes subjects to squint. The true magic lies in indirect light—the soft, diffused light from a window that isn’t receiving direct sun. This light acts like a giant, natural softbox, wrapping gently around the subject’s features to create soft transitions from light to shadow.
The quality of this light is flattering, elegant, and requires minimal intervention. Your primary job is not to create light, but to position your subject relative to the source to shape it. By treating the window as a studio key light, you can create classic portrait patterns simply by rotating your subject. Facing them toward the window creates a flat, beautiful butterfly light. Turning them 45 degrees away creates a gentle loop light. This is light diagnosis in its purest form: identifying a quality source and using positioning to achieve a specific, desired outcome.
The goal is to control the shadows with precision. As PhotoWorkout’s editorial team advises, a classic starting point is to position the subject beside a window at roughly 45 degrees. The key is to watch the shadow cast by the nose. As you rotate the subject further from the light source, that shadow will lengthen and eventually connect with the shadow on the cheek. When a distinct triangle of light is left on the far cheek, you have achieved a classic Rembrandt pattern. This adds depth and dimension, turning a simple portrait into a timeless image, all without a single piece of artificial lighting equipment.
How to Modify Harsh Sunlight With Reflectors and Scrims for Soft Flattering Ambient Wedding Portraits
There are times, especially during midday outdoor portraits, when harsh sunlight is unavoidable. The default reaction is often to find shade, but a more powerful approach is to modify the existing ambient light. This is where tools like reflectors and scrims move from being accessories to being essential light-shaping instruments. Your first diagnostic step is to decide: do you need to add, subtract, or diffuse light?
Wedding photographer Jason Groupp’s approach to midday sun is a masterclass in this philosophy. He backlights the couple with the harsh sun, which creates a beautiful rim light separating them from the background, and then uses a reflector to fill in the shadows on their faces. This treats the sun as a powerful backlight and the reflector as the key light. The crucial insight is his belief that “no lighting manufacturer has yet matched the quality of light from the sun.” The goal is not to fight the sun, but to harness its power and redirect it.
Case Study: Using the Sun and a Reflector for Outdoor Bridal Portraits
Photographer Jason Groupp explains his default strategy for harsh midday sun. Rather than avoiding it, he embraces it as a powerful backlight. He positions the couple so the sun is behind them, creating a clean separation and hair light. Then, before the couple is even in position, he calibrates his exposure and uses a large reflector as his main light source to fill in the shadows on their faces. This turns a challenging lighting scenario into a controlled, high-quality portrait setup, proving that modifying ambient light is often superior to creating artificial light from scratch.
The choice of reflector surface is a critical part of this process. It’s not just about bouncing light, but about controlling its color and quality. A white surface provides a soft, neutral fill perfect for subtle portraits, while silver adds more contrast and a specular “pop.” A gold reflector can enhance a sunset feel but must be used with caution to avoid unnatural orange skin tones. And a translucent panel, or scrim, is used not to reflect light but to diffuse it, turning the harsh sun into a large, soft source. Equally important is the black surface, used for subtractive lighting to absorb unwanted bounce light from bright pavement and add dimension.
This table from a recent comparative analysis of reflector surfaces breaks down the decision-making process:
| Surface | Effect on Light | Best Use Case |
|---|---|---|
| Silver | Increases highlights, higher contrast | Specular catchlight pop, video, black & white work |
| Gold | Adds a warm, golden cast | Enhancing sunset sessions, use sparingly to avoid an unnatural orange look |
| White | Even, neutral bounce | Subtle, natural-looking fill light for most portraits |
| Black | Absorbs/blocks light | Subtracting unwanted bounce light to add contrast and dimension |
| Translucent | Diffuses direct light | Turning harsh direct sun into a large, soft light source (scrim) |
Tungsten Ballrooms or LED Uplighting: Which Ambient Light Sources Create the Worst Colour Casts on Skin
Not all ambient light is created equal. While your camera’s white balance can handle traditional tungsten or daylight, the rise of cheap, low-quality LED fixtures at receptions presents a significant challenge: severe color contamination. These lights, often used by DJs or as venue uplighting in vibrant purples, magentas, and greens, can wreak havoc on skin tones in a way that is difficult, if not impossible, to correct in post-production.
The problem lies in a low Color Rendering Index (CRI). CRI is a measure of a light source’s ability to faithfully reveal the colors of objects in comparison to an ideal light source. As lighting engineers explain, light sources rated below a CRI of 80 are considered to have poor color rendering, which often manifests as sickly, unnatural skin tones. Even more critically, the standard CRI value is an average that can be misleading. For skin tones, the specific R9 value, which measures the rendering of strong red, is paramount. Many low-cost LEDs have a terrible R9 value, which is why skin can look pale or greenish even under a light that seems “warm.”
Your diagnostic task at a reception is to identify these low-quality sources. A traditional tungsten bulb in a ballroom lamp, while warm (around 3200K), has a near-perfect CRI of 100. It produces a clean, consistent color that is easily balanced. In contrast, a colored LED uplight has an intentionally poor and incomplete spectrum. The worst offender is often a mix of the two, bathing one side of a person’s face in warm, clean tungsten light and the other in a cool, spiky LED light. The best strategy is to position your subjects so their faces are illuminated by the highest-quality source available, letting the colored lights exist only as background elements.
The Wide Aperture Mistake That Causes Missed Focus When Shooting Ambient Light in Bright Venues
To compensate for low light or achieve a shallow depth of field, photographers instinctively reach for wide-aperture prime lenses, shooting at f/1.8, f/1.4, or even f/1.2. However, this introduces a common and frustrating technical trap: a high rate of missed focus. This is often blamed on the camera or lens, but the true culprit is usually a flawed technique called “focus-and-recompose.”
This technique involves using the center focus point to lock focus on the subject’s eye, then recomposing the shot before taking the picture. As the Fstoppers editorial team bluntly states, “This may work when shooting at f5.6+ but it definitely does not work when shooting at f1.6.” The reason is simple physics. When you rotate the camera to recompose, the focal plane—the razor-thin slice of the world that is in perfect focus—rotates with it. It moves off the subject’s eye, often landing on their ear or the space behind their head. The wider your aperture, the thinner this plane becomes, making the error more pronounced. For instance, one depth-of-field calculation demonstrates that with an 85mm lens at f/1.8 from a one-meter distance, the total depth of field is a mere 1.35cm. A slight pivot of the camera is more than enough to throw the eye out of focus.
This may work when shooting at f5.6+ but it definitely does not work when shooting at f1.6.
– Fstoppers Editorial Team, Here’s Why Focusing and Recomposing Photographs Fails
The solution is to abandon this habit entirely when shooting wide open. Instead of moving the camera, you must move the focus point. Modern cameras make this easy with AF joysticks or touchscreens. By placing the active focus point directly over the subject’s eye, the focal plane remains exactly where it needs to be, ensuring critical sharpness even with the thinnest depth of field.
Action Plan: Fixing Missed Focus at Wide Apertures
- Abandon Focus-and-Recompose: At wide apertures, move the focus point rather than recomposing. Use the AF joystick or touchscreen to place the AF point directly on the subject’s near eye.
- Know Your Lens’s Sweet Spot: Test your f/1.4 primes. Many gain significant sharpness when stopped down slightly to f/1.8 or f/2.0, with minimal loss of light or background blur.
- Watch Your Shutter Speed: In bright sun, a wide aperture can force your shutter speed beyond your camera’s maximum (e.g., 1/4000s). An ND filter becomes necessary to maintain the desired aperture.
- Rule Out Motion Blur: Before blaming the focus system, check your shutter speed. A speed that’s too slow can create the appearance of missed focus when the real issue is subject or camera movement.
- Utilize Eye-AF: If your camera has a reliable Eye-AF system, trust it. It’s designed specifically to solve this problem by tracking the eye across the frame, eliminating the need for manual AF point selection in many cases.
How to Photograph Dark Historic Church Interiors Without Flash or Tripod
A dark, historic church with a strict “no flash, no tripod” rule is the ultimate test of an ambient light photographer. Success here isn’t about one magic setting, but a prioritized sequence of decisions. The goal is to get enough light onto the sensor to create a clean image while maintaining a fast enough shutter speed to prevent motion blur from either the subject or your own handshake. This is the exposure triangle under extreme pressure.
The common impulse is to immediately jump to a very high ISO. This is a mistake. Your first adjustments should always be aperture and shutter speed. Start by opening your lens to its widest aperture (e.g., f/1.8). This is non-negotiable; you need every bit of light you can get. Next, determine your minimum handheld shutter speed. For a static scene, and with modern lens and body stabilization, you might be able to get a sharp shot at 1/60s or even 1/30s. This is your floor. Do not go below it unless you are intentionally creating motion blur.
Only after you have maxed out your aperture and set your minimum safe shutter speed should you begin to incrementally increase your ISO. Start at a base like ISO 400 or 800 and take a test shot. If it’s too dark, raise the ISO one stop at a time until you achieve a workable exposure. Modern full-frame sensors can produce remarkably clean files at ISO 3200, 6400, or even higher. The key is to see ISO not as a first resort, but as the final variable you adjust once the other two are at their physical limits. Increasing your ISO will make your camera sensor more sensitive to light, but you must be mindful of the noise levels that come as a trade-off.
How to Find and Use Open Shade in Garden Ceremonies for Soft Flattering Portrait Light
During an outdoor wedding, the sun can be your greatest enemy or your best friend. While direct midday sun is harsh, the solution is often just a few steps away. The concept of “open shade” is one of the most powerful, simple, and underutilized tools in a wedding photographer’s arsenal. It’s the key to creating soft, flattering portraits even in the brightest part of the day.
Open shade is not just any shade. It is the area at the edge of a shadow, typically created by a large object like a building or a dense group of trees. A person standing in open shade is not directly lit by the sun, but they are illuminated by the vast, open sky, which acts as an enormous, diffused light source. This creates a light that is soft, directional, and incredibly flattering. The key is to place your subjects at the very edge of the shadow line, facing out towards the open sky. This gives their faces beautiful, soft light while often allowing the bright, sunlit background to be part of the composition, creating a sense of place and a beautiful separation.
If I can, I shoot my portraits in the day using natural light with backlighting or open shade.
– Aftershoot Editorial Team, 6 Wedding Photography Lighting Techniques (Without Overcomplicating It)
The diagnostic process is simple: scan your environment not for darkness, but for the transition line between sun and shadow. The north side of a building is a classic source of all-day open shade. A large tree canopy, an archway, or a covered porch all create these pockets of beautiful light. By learning to identify and use these spots, you stop being a victim of the sun’s position and start using the landscape itself as your primary light-shaping tool.
How to Schedule and Maximise Golden Hour for Romantic Wedding Couple Portraits
Golden hour—the brief period shortly after sunrise or before sunset—is legendary among photographers for its magical light quality. The low angle of the sun produces a warm, soft, and directional light that is universally flattering. It creates long, gentle shadows that add dimension and a beautiful golden hue that imbues photos with a romantic, ethereal feel. For wedding photographers, capturing portraits during this time is often a top priority.
However, the challenge of golden hour is not aesthetic, but logistical. On a wedding day, this magical window of light often coincides with other key events like the reception dinner or speeches. Simply hoping to “grab the couple for a few photos” is a recipe for failure. Maximizing golden hour requires proactive planning and communication long before the wedding day. When reviewing the timeline with the couple, you must specifically block out 15-20 minutes for these portraits. Frame it not as taking them away from their guests, but as scheduling the one time of day that will produce their most iconic, romantic images.
When the time comes, you must be efficient. The light changes rapidly and the window is short. This means you must have pre-scouted your locations. Know exactly where you will take the couple and have a shot list in your head. Start with your “safe” shots and then move to more creative compositions. This is not the time for experimentation, but for the confident execution of a well-rehearsed plan. By treating golden hour as a scheduled, high-priority event, you transform it from a lucky break into a reliable part of your creative toolkit.
Key Takeaways
- Light quality is more important than light quantity. Learn to diagnose direction, hardness, and color before you touch your camera settings.
- Your primary tools for controlling ambient light are positioning, modification (reflectors/scrims), and subtraction (black flags), not just your aperture and ISO.
- Technical errors like missed focus often stem from improper technique (focus-and-recompose) rather than faulty gear, especially at wide apertures.
When to Abandon Ambient Light and Introduce Flash as Reception Venues Transition From Dusk to Dark
The ultimate sign of a master is not dogmatic adherence to a single technique, but knowing the precise moment to switch tools for a better result. While mastering ambient light is a powerful skill, there comes a point during every wedding reception where relying on it exclusively becomes a liability. The transition from dusk to dark is the critical phase where you must decide to either abandon ambient light or, more skillfully, begin blending it with flash.
The decision point is usually a combination of two factors: light quality and light quantity. As evening falls, the quantity of available light plummets. You can chase it by pushing your ISO higher and your shutter speed lower, but you will eventually hit a wall where images become unacceptably noisy or blurry. More importantly, the quality of the ambient light often degrades. A room that was filled with beautiful, soft window light in the afternoon becomes a patchwork of dim, high-contrast, poor-CRI light sources at night. At this point, you are no longer shaping beautiful light; you are merely fighting darkness.
A Working Photographer’s Dusk-to-Dark Lighting Plan
One professional’s strategy illustrates this transition perfectly. During the early evening reception, they blend flash with ambient light, slowing their shutter speed down to 1/60s or 1/30s. This allows the camera to “soak in” the warm ambient glow of the venue, while a gentle pop of flash freezes the subject and provides clean light on their faces. Later in the night, for high-energy dance floor shots, they switch to a direct flash technique to create a more dramatic, energetic look. This shows that the decision is not a single cutoff moment, but a fluid, shot-by-shot choice based on the desired creative outcome.
The expert move is not to simply switch on a flash and blast away the ambient mood. The goal is to introduce artificial light strategically. This often means “dragging the shutter”—using a slower shutter speed to capture the ambient background while a quick pop of flash freezes your primary subject. This technique preserves the atmosphere of the venue while ensuring your subjects are sharp and well-lit. True expertise is knowing that flash is not the enemy of ambient light; when used correctly, it is its most powerful partner.
To put these principles into practice, the next logical step is to scout your next venue not just for pretty backdrops, but for the quality, color, and direction of its light sources at the specific time of the event.