
In summary:
- Success in low light is not about one setting, but about making strategic compromises between ISO, shutter speed, and aperture.
- Blend subtle, bounced fill flash with existing ambient light to create depth and avoid the “on-camera flash” look.
- Understand ISO invariance to correctly expose for highlights and lift shadows in post-production without creating muddy, noisy images.
- Use slow-sync flash techniques on the dance floor to combine sharp subjects with creative motion blur, capturing the energy of the moment.
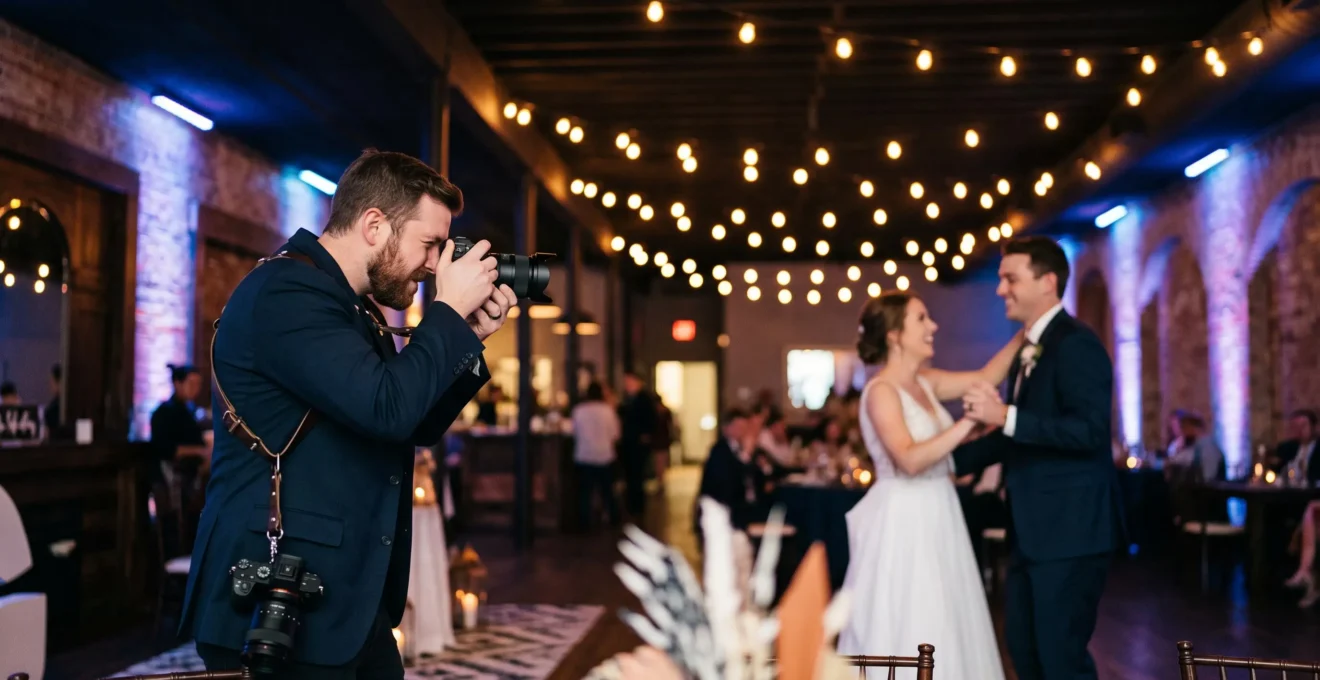
We’ve all been there: the ballroom’s lights dim, the DJ’s uplighting paints the walls purple, and the couple begins their first dance. For a wedding photographer, this is where the technical challenge skyrockets. The sinking feeling of delivering noisy, blurry, or flatly lit images from a beautiful but dark reception is a common fear. The usual advice—”use a fast lens” or “just raise the ISO”—often falls short in converted barns with high, dark ceilings or historic venues where flash is restricted. These generic tips ignore the real-world tradeoffs.
Pushing your ISO too high results in digital noise that destroys detail. Using a wide-open aperture like f/1.2 gives you light but a razor-thin depth of field, making it impossible to get more than one person in focus. Slowing the shutter speed introduces motion blur, turning cherished moments into abstract streaks. Relying on direct, on-camera flash creates harsh shadows and a disconnected, “paparazzi” look that kills the ambient mood you were hired to capture.
But what if the solution wasn’t about finding a single magic setting? What if it was about mastering a series of strategic decisions? This guide moves beyond the basics to focus on the professional’s dilemma: how to manage the unavoidable compromises between light, motion, and image quality. We will break down how to blend artificial light with ambient mood, when to choose primes over zooms, how to leverage modern sensor technology to your advantage, and how to create dynamic dance floor shots that feel alive.
This article provides a complete technical workflow for tackling the darkest reception venues. By understanding the ‘why’ behind each technique, you can move from hoping for a good shot to intentionally creating stunning, natural-looking images in any lighting condition. The following sections break down each critical decision point you’ll face as the lights go down.
Summary: Mastering Dark Reception Photography: How to Get Clean, Natural Images Without Harsh Flash
- Why Dark Reception Venues Force You to Choose Between Noise, Motion Blur, or Shallow Focus
- How to Balance Existing Reception Lighting With Subtle Fill Flash for Natural-Looking Results
- f/1.2 Primes for Light Gathering or f/2.8 Zooms for Flexibility: Which Serves Dark Reception Coverage Better
- The Underexposure Mistake That Delivers Dark Muddy Images While Trying to Control Noise
- When to Use Continuous LED Video Lights Instead of Flash in Extremely Dark Reception Venues
- When to Abandon Ambient Light and Introduce Flash as Reception Venues Transition From Dusk to Dark
- How to Combine Motion Blur With Sharp Subjects Using Slow-Sync Flash on Dance Floors
- How to Photograph Dance Floor Energy That Makes Viewers Feel the Music and Movement
Why Dark Reception Venues Force You to Choose Between Noise, Motion Blur, or Shallow Focus
In a dark reception hall, the laws of physics present a fundamental challenge known as the exposure triangle, but for a low-light specialist, it’s better termed the Creative Compromise Triangle. Every decision you make to gather more light forces a trade-off in another area of image quality. You cannot have everything; you must choose your compromise strategically. Understanding this is the first step toward mastering low-light environments.
The three main compromises are:
- Noise: The most obvious solution is to increase your camera’s ISO, making the sensor more sensitive to light. However, the higher the ISO, the more digital noise is introduced, which can manifest as distracting speckles and color blotches, reducing detail and giving images a cheap, unprofessional look.
- Motion Blur: To let more ambient light in, you can slow your shutter speed. This is effective for static details, but once people start moving—during speeches, toasts, or dancing—a slow shutter will turn them into indistinct blurs. You sacrifice sharpness for brightness.
- Shallow Focus: Using a “fast” prime lens with an aperture of f/1.4 or f/1.2 is an excellent way to gather light. The trade-off is an extremely shallow depth of field. While beautiful for an isolated portrait, it becomes a liability when you need to capture a group at a table or a couple interacting, as only a small slice of the scene will be in focus.
The image below conceptually represents this technical balancing act. You are constantly choosing which of these three elements—grain, blur, or shallow focus—you are willing to accept to achieve your desired shot. A professional’s job is not to eliminate them entirely, but to control them and make the compromise an intentional, creative choice.
Ultimately, there is no single “correct” setting. The best photographers learn to evaluate a scene and decide which compromise is least detrimental to the story they are telling. For a quiet, emotional moment, a bit of clean grain might be acceptable. For a dynamic dance shot, controlled motion blur might be the goal. Recognizing this choice is what separates amateurs from professionals.
How to Balance Existing Reception Lighting With Subtle Fill Flash for Natural-Looking Results
Once you accept the need for artificial light, the goal is not to overpower the ambient mood but to enhance it. The key is light-blending: using your flash as a subtle “fill” to lift shadows and add a pop of clean light to your subjects, while preserving the beautiful, warm atmosphere of the venue. The most common and effective technique for this is bounce flash.
Instead of pointing your flash directly at the subject, you aim it at a large, neutral-colored surface like a low, white ceiling or a nearby wall. This turns the surface into a massive softbox, creating soft, flattering light that wraps around your subjects. It avoids the harsh shadows and “deer-in-the-headlights” look of direct flash. To achieve the most natural look, it’s best to angle the light. Pointing the flash backward or to the side ensures the bounced light hits the subject from a more pleasing angle, rather than directly overhead which can create unflattering “raccoon eyes.”
Case Study: Bouncing and Modifying for Natural Light
In a practical example, a wedding photographer describes her process for using on-camera flash effectively. When a suitable surface is available, she rotates the flash head to bounce light off a wall or ceiling. However, in venues without this option (like a barn with high, dark wood beams or an outdoor tent), she switches to a modifier like a MagMod grid or sphere. This allows her to shape and soften the light directly from the camera, maintaining a degree of control and avoiding harshness even without a surface to bounce from.
However, this technique has its limits. Bounce flash is ineffective in venues with very high or dark-colored ceilings, as there’s nothing to efficiently reflect the light back onto your subjects. In these challenging situations, you must either find an alternative surface or switch to a different lighting strategy altogether. This is where understanding your environment is critical. As renowned lighting expert Neil van Niekerk explains, the direction of the bounce is key to the quality of the light. He notes that the best light often comes from bouncing the flash from behind the photographer, as stated in a discussion on bounce flash techniques at wedding receptions.
From behind me, because that is how I get the best light from my on-camera flash.
– Neil van Niekerk, Tangents — Bounce flash photography at wedding receptions
This approach creates a light pattern similar to a main light in a studio, giving dimension and shape to the subjects while still feeling integrated with the ambient light of the room. It’s a deliberate choice that elevates a simple bounce into a sophisticated lighting technique.
f/1.2 Primes for Light Gathering or f/2.8 Zooms for Flexibility: Which Serves Dark Reception Coverage Better
Your lens choice is a pivotal decision in dark receptions, representing a direct trade-off between maximum light-gathering ability and compositional flexibility. There isn’t one right answer; the best choice depends on your shooting style and the specific demands of the moment. Many professionals carry both, but understanding their distinct strengths and weaknesses is key to knowing which to mount when the lights go down.
Fast prime lenses (like a 35mm f/1.4 or 50mm f/1.2) are the undisputed kings of light gathering. Opening up to such a wide aperture can be the difference between a usable shot and a blurry mess. They allow you to keep your ISO lower and your shutter speed faster. However, their fixed focal length means you must “zoom with your feet,” which can be difficult in a crowded reception. The extremely shallow depth of field also requires precise focusing and makes group shots challenging. As photographer Catherine Guidry notes, the performance can be remarkable:
My 1.2 aperture lens focuses so much faster and produces sharper images than my 24 – 70 mm Nikkor lens.
– Catherine Guidry, Catherine Guidry Photography
On the other hand, professional f/2.8 zoom lenses (like a 24-70mm or 70-200mm) offer incredible versatility. You can go from a wide-angle shot of the whole room to a tight shot of the couple’s hands without moving an inch. This flexibility is invaluable for capturing fleeting moments. While f/2.8 is the professional minimum, it offers significantly less light than an f/1.4 or f/1.8 prime, forcing you to compensate with a higher ISO or the addition of flash. Their autofocus systems are often built for speed and reliability, making them workhorses for event coverage.
The following table, based on a comparative analysis of wedding photography lenses, breaks down the core differences in a reception context.
| Criterion | Fast Prime (e.g., 35mm/50mm f/1.4-f/1.8) | Pro Zoom (24-70mm f/2.8) |
|---|---|---|
| Minimum aperture for weddings | f/1.8 or faster is ideal | f/2.8 is the minimum |
| Versatility | Fixed focal length; you ‘zoom with your feet’ | Covers wide, standard, and short telephoto without changing lenses |
| Autofocus reliability | Can be less consistent at very wide apertures | Built with fast, accurate AF motors for fleeting moments |
| Recommended kit approach | Pair with a zoom rather than relying on it alone | Most professionals carry both prime and zoom together |
Ultimately, the choice is not about which lens is “better,” but which tool is right for the job at hand. Many photographers use a zoom during dynamic parts of the evening like introductions and then switch to a prime for more controlled, atmospheric shots like the first dance.
The Underexposure Mistake That Delivers Dark Muddy Images While Trying to Control Noise
A common but flawed strategy in dark venues is to intentionally underexpose an image to keep the ISO low, with the plan of “fixing it in post.” The photographer fears noise at ISO 3200 or 6400 and instead shoots at ISO 800, resulting in a dark file they must brighten significantly. On older cameras, this was a recipe for disaster, creating “muddy” shadows filled with ugly, blotchy color noise that was far worse than the clean grain of a higher ISO. While this fear is ingrained, modern camera sensors have changed the game thanks to a concept called ISO invariance.
In simple terms, an ISO-invariant sensor produces roughly the same amount of noise whether you raise the ISO in-camera or shoot at a lower ISO and brighten the image later in software. According to a technical explanation on the principles of ISO invariance, if your camera sensor is highly invariant, there is almost no noise penalty for brightening a photo in post-production. This means the old fear of “muddy shadows” from underexposing is largely a thing of the past for many current cameras.
This is not a license to be sloppy with exposure. The correct strategy, known as “exposing to the right” (ETTR), is to make your image as bright as possible in-camera *without clipping the highlights*. In a dark reception, this might mean your subject looks well-exposed but the background is very dark. The key is that with an ISO-invariant sensor, if you must choose between protecting your highlights from blowing out or underexposing your subject, you should prioritize the highlights. You can lift the shadows in post with minimal penalty. On many modern cameras, images shot at ISO 3200 or even 6400 are perfectly usable, exhibiting a fine, film-like grain rather than destructive noise.
The mistake, therefore, is not underexposure itself, but fear-driven underexposure. By trying to avoid a high ISO number on a capable modern camera, photographers often create a darker file than necessary, sacrificing valuable shadow data. The correct approach is to trust your gear, push the ISO to what’s needed for a healthy exposure of your subject, and know that you have the flexibility in post to manage the result.
When to Use Continuous LED Video Lights Instead of Flash in Extremely Dark Reception Venues
While flash is the go-to tool for stills, there are situations in extremely dark venues where a continuous light source, like a small LED video light, offers a unique set of advantages. Flash provides a powerful burst of light that freezes motion, but it also means you are composing and focusing in near-darkness between shots. A continuous light changes this dynamic entirely.
The primary benefit of an LED light is “what you see is what you get” (WYSIWYG). The scene is constantly illuminated, allowing your camera’s autofocus system to work more reliably and letting you see the light patterns, shadows, and highlights in real-time. This can be a lifesaver in venues that are truly pitch-black, where even a flash’s AF-assist beam might struggle. It’s particularly useful for moments like the cake cutting or detailed shots where precision is key.
However, LED lights are not a perfect replacement for flash. They are typically far less powerful, meaning you may still need to use a high ISO or a wide aperture. They also don’t have the motion-freezing power of a flash’s short-duration burst. For this reason, they are best suited for relatively static moments rather than the high-energy dance floor. Furthermore, the quality of light can be harsh if used directly, so it’s often best to bounce it or use it with a small softbox or diffuser.
Case Study: The Hybrid Lighting Approach
In one photographer’s favorite low-light setup, she leverages a hybrid approach. For extremely dark moments, she will hold a small, handheld video light in one hand to provide a constant base of light for focusing and ambient lift, while still using a bounced, on-camera flash on her camera for the main exposure. This combination gives her the best of both worlds: the focusing and WYSIWYG benefit of continuous light, and the power and motion-freezing capability of flash.
Using an LED light is a strategic choice. It’s not for every situation, but when the ambient light is so low that your camera can’t even function, a small, constant light source can be the tool that saves the shot. It provides a foundation of light to work from, allowing your other tools—and your creativity—to take over.
When to Abandon Ambient Light and Introduce Flash as Reception Venues Transition From Dusk to Dark
There’s a magical period during a wedding reception, as dusk turns to night, where the ambient light is low but beautiful. Many photographers try to hold onto this natural light for as long as possible, pushing their gear to its absolute limits. While admirable, there comes a clear tipping point where relying solely on ambient light becomes a detriment to your images. Recognizing this moment and decisively introducing flash is a critical skill.
The decision to switch is not just about whether you *can* get an exposure, but whether you can get a *good* one. As a wedding photographer, your job is to capture reactions, emotions, and moments. As the light fades, your shutter speed must drop to compensate. Eventually, it becomes too slow to freeze even subtle movements, resulting in motion blur. An emotional smile during a toast becomes a soft, indistinct expression. Furthermore, your camera’s autofocus system begins to hunt and fail in the darkness, causing you to miss key moments entirely.
As photographer Esther Gibbons points out, this reliance on ambient light has clear limitations. In a complete guide on flash techniques for wedding reception photos, she notes that the slower shutter speed required can cause blurry photos and that photographers may simply be unable to capture reactions in the dark without adding their own light. The moment you start losing sharp, emotive images to motion blur or missed focus is the moment to introduce flash.
This transition should be a conscious part of your plan. As the light changes, your gear strategy must adapt. This often means switching to a lens with a wider aperture, such as an f/1.8 or f/1.4 prime, which gives you a much better chance of holding onto ambient light a little longer. It also means relying on a camera body with excellent high-ISO performance, as more expensive bodies generally handle noise far better as the light drops. But even with the best gear, a point will come where the quality of the ambient light is simply too poor and too low to work with. At this point, introducing a subtle, bounced flash isn’t giving up; it’s taking control.
Key takeaways
- Mastering dark venues is about making intentional creative compromises between noise, motion, and depth of field.
- Blend bounced flash with ambient light for natural-looking results, but have a strategy for when bouncing isn’t an option.
- Combine slow shutter speeds with rear-curtain sync flash to create dynamic dance floor photos that have both motion trails and sharp subjects.
How to Combine Motion Blur With Sharp Subjects Using Slow-Sync Flash on Dance Floors
The dance floor is the ultimate test of a low-light photographer, demanding a technique that can capture both the wild energy of the movement and the sharp, joyful expressions of the subjects. This is achieved with a technique called shutter dragging, or slow-sync flash. It’s a creative use of the “Creative Compromise Triangle,” intentionally accepting motion blur to create a dynamic effect.
The technique works by combining a slow shutter speed (to capture ambient light and motion trails) with a burst of flash (to freeze the subject). The key is setting your camera to rear-curtain sync (or 2nd curtain sync). By default, a flash fires at the beginning of an exposure. With rear-curtain sync, the shutter opens, the sensor records the ambient light and any movement (the blur), and then the flash fires just before the shutter closes, freezing your subject at the end of their motion. This creates a natural-looking effect where the light trails follow the subject, conveying a true sense of movement.
As photographer Holly Birch explains, the timing is crucial: the first curtain opens to expose the sensor, and the second curtain closes to end it. With rear-curtain sync, the flash fires at the end of the exposure, just before that second curtain closes. This mechanical difference is what creates the “blur-then-freeze” look. Conversely, front-curtain sync fires the flash first, freezing the subject, and then records any subsequent motion, which can look unnatural as if the subject is moving backward.
Action Plan: Your First Shutter Drag on the Dance Floor
- Set to Rear-Curtain Sync: Dive into your camera’s flash menu and select “Rear” or “2nd Curtain” sync. This is the most critical step.
- Select a Slow Shutter Speed: Start with a shutter speed around 1/10 to 1/30 sec. This is slow enough to create motion trails as you move the camera.
- Balance Your Aperture: Set your aperture based on the ambient light and how much of the background you want in focus. A range of f/2.8 to f/5.6 is a good starting point.
- Use Low Flash Power: You want the flash to freeze the subject, not obliterate the ambient light. Set your flash power manually to a low setting like 1/32 or 1/64.
- Move with the Action: As you press the shutter, physically move your camera (pan, twist, or zoom) to create the light trails. The flash will fire at the end, freezing a sharp subject amidst your created blur.
Mastering this technique takes practice. You have to experiment with different camera movements and shutter speeds to get the effect you want. The power of the technique is detailed in a comprehensive guide to shutter-dragging on the dance floor, which highlights that control is paramount. But once you master it, shutter dragging allows you to transform a dark, chaotic dance floor into a canvas for creating vibrant, energetic, and truly memorable photographs.
How to Photograph Dance Floor Energy That Makes Viewers Feel the Music and Movement
Beyond the single, impactful shutter-drag photo, capturing the overall energy of the dance floor requires a broader lighting strategy. The goal is to create a dynamic, multi-layered look that makes the viewer feel like they are in the middle of the party. This is where moving beyond a single on-camera flash to a multi-light setup using off-camera flash (OCF) can elevate your work from documentary to cinematic.
A simple yet incredibly effective setup is to place one or two flashes in the corners of the dance floor, opposite the DJ booth. These flashes can be set to a low power and aimed back towards the center of the action. They serve as rim lights or backlights, separating your subjects from the dark background and catching the edges of hair, dresses, and thrown hands with a pop of light. This single addition creates an immediate sense of depth and dimension that an on-camera flash alone can never achieve.
You can then use your on-camera flash, often bounced or modified, as the main or fill light for the subjects closest to you. By setting your on-camera flash as a trigger (in commander mode), you can control the power of your off-camera flashes remotely, allowing you to adjust the look on the fly. For a particularly dramatic effect, some photographers will place a bare-bulb flash directly behind the couple on the dance floor, pointing back at the camera. When triggered at full power, it can create a stunning starburst or flare effect, silhouetting the couple against a blast of light.
These techniques transform the dance floor from a dark, challenging space into a creative playground. You are no longer just a passive observer trying to get a clean shot; you are actively designing the light to sculpt the scene. By adding backlights, rim lights, and creative flares, you can capture the sweat, the laughter, and the pure kinetic energy of the celebration in a way that is both technically clean and artistically compelling. The final images don’t just show people dancing; they make the viewer feel the beat of the music.
By moving beyond a single light source and thinking like a lighting designer, you can consistently create dance floor images that are filled with energy, emotion, and life. Your final step is to take these technical solutions and apply them consistently to develop your own signature style for challenging lighting conditions.