
Achieving a cinematic look isn’t about owning a fast lens; it’s about using depth of field as a deliberate narrative tool to guide emotion.
- Mastering modern tools like Eye AF is the key to confidently shooting wide open (f/1.4, f/1.2) on moving subjects.
- The choice between shallow and deep focus should be a conscious decision based on whether you want to isolate an emotion or document a scene’s context.
Recommendation: Stop shooting for safety at f/2.8 and start thinking like a cinematographer: use your aperture to decide what the viewer feels, not just what they see.
For many wedding photographers, f/2.8 is a comfort zone. It’s safe, reliable, and guarantees sharp images. Yet, you scroll through award-winning galleries and see something different: images with a profound, film-like quality where the subject feels sculpted out of the scene, surrounded by a dream-like blur. This is the allure of cinematic shallow depth of field. The common advice is to simply “buy a fast lens and shoot wide open.” But this often leads to a frustratingly high number of missed shots and photos where the beautiful venue, which the couple paid thousands for, is reduced to an unidentifiable, creamy mush.
The secret doesn’t lie in the gear alone, but in a fundamental shift in mindset. It requires moving from the role of a documentarian to that of a cinematographer. A cinematographer doesn’t just capture a scene; they direct the viewer’s eye. They use focus not just for sharpness, but as a narrative tool to create emotional rhythm, to emphasize a fleeting glance, a single tear, or the quiet space between two people in love. This is the essence of creating images that feel less like snapshots and more like stills from a feature film.
This guide is designed to bridge that gap. We won’t just talk about apertures and focal lengths. We will explore the art of using focus as a storytelling device. We’ll break down how to nail critical focus at f/1.2 on a moving subject, when to sacrifice bokeh to preserve the story of the environment, and how the very character of your lens’s blur can change the mood of a portrait. It’s time to leave the safety of f/2.8 behind and learn to control every plane of focus to craft a wedding story with true emotional depth and impact.
This comprehensive guide is structured to walk you through the cinematic approach to depth of field, from understanding its emotional power to mastering its technical execution. Each section builds on the last, providing a complete framework for transforming your wedding photography.
Summary: How to Create Cinematic Depth of Field That Makes Wedding Photos Look Like Film Stills
- Why Cinematic Shallow Depth of Field Creates Stronger Emotional Impact Than Edge-to-Edge Sharpness
- How to Nail Focus at f/1.2 on Moving Subjects Without Relying on Excessive Depth of Field
- 85mm f/1.4 or 135mm f/2: How to Anticipate and Capture Candid Wedding Moments Before They Vanish Forever
- The Bokeh Obsession That Loses All Environmental Context in Wedding Venue Photography
- When to Shoot Cinematic Shallow Focus and When to Choose Documentary Depth During Wedding Coverage
- Why Some Lenses Create Smooth Creamy Bokeh While Others Produce Harsh Distracting Background Blur
- How to Capture Intimate Emotional Moments With 135mm+ Lenses Without Feeling Distant or Detached
- How to Create Dreamy Bokeh Background Separation That Makes Subjects Pop in Wedding Portraits
Why Cinematic Shallow Depth of Field Creates Stronger Emotional Impact Than Edge-to-Edge Sharpness
In filmmaking, a director uses a shallow depth of field to force the audience’s attention onto a single character or object. Everything else melts away, and for that moment, only that one detail matters. This technique translates directly into still photography with potent emotional results. An image that is sharp from edge to edge presents a scene for observation; an image with a razor-thin plane of focus invites the viewer into an intimate experience. It isolates the emotion. When you throw the background completely out of focus, you’re not just creating separation; you’re telling the viewer, “Look here. This is the heart of the story.”
This approach aligns perfectly with modern wedding trends. The market is increasingly moving away from stiff, posed photography and towards authentic, unposed moments. In fact, an industry analysis reveals that candid photography now leads the style segment of the wedding photography market with a 40.3% share. Couples want to feel the emotion of the day, not just see a record of who was there. Shallow depth of field is a primary tool for achieving this. By blurring out the visual noise—distracting guests, cluttered backgrounds, uninteresting architecture—you distill the moment down to its most powerful emotional core: the bride’s nervous smile, the groom’s tear, the gentle touch of a hand.
This selective focus creates a psychological hierarchy. It guides the brain, making the in-focus subject feel more significant and memorable. As the ShootDotEdit Editorial Team notes, this is the power of the cinematic style:
Cinematic wedding photos are sweeping the industry, and for good reason—they evoke emotion, create timeless memories, and tell a story that feels straight out of a movie.
– ShootDotEdit Editorial Team, Cinematic Wedding Photos: Inspiration From ShootDotEdit Customers
Edge-to-edge sharpness has its place in documentary work, but for creating iconic, emotional portraits, mastering shallow depth of field is non-negotiable. It transforms a photograph from a simple statement of fact into a piece of evocative, narrative art. The goal is to create a visual silence around your subject, allowing their emotion to be the loudest thing in the frame.
How to Nail Focus at f/1.2 on Moving Subjects Without Relying on Excessive Depth of Field
The single greatest fear preventing photographers from using ultra-fast apertures like f/1.2 or f/1.4 is the risk of missing focus. On a moving subject like a bride walking down the aisle, the depth of field can be mere millimeters thin. Historically, this meant relying on manual focus skills or stopping down to a “safer” aperture. However, modern mirrorless camera technology, specifically advanced Eye Autofocus (Eye AF), has completely changed the game. This isn’t a crutch; it’s a precision tool that liberates you to concentrate on composition and emotion rather than nervously tracking a focus point.
To use it effectively, you must move beyond the default settings. Activating and optimizing Eye AF is the key to achieving a near-perfect hit rate, even wide open. Most professional wedding photographers shooting portraits aim for this look, with data showing they typically shoot wide open, anywhere between f/1.2 and f/2.8, to achieve soft, dreamlike backgrounds. As photographer Dixie Dixon explains, mastering this technology allows you to focus on what truly matters:
I’m not so worried about keeping focus on the eye, so I’m free to focus on my connection with the person…that’s what I love about photography, that connection you can get, and now I can capture really candid moments because [the camera] automatically focuses on the eyes.
– Dixie Dixon, Eye to Z: Eye AF Now Available for Z Cameras – Nikon USA
Trusting your gear starts with configuring it for your specific needs. Instead of just turning Eye AF on, you need to make it an extension of your creative intent. The following steps will help you set up your camera to perform reliably in the fast-paced environment of a wedding.
Your Action Plan: Optimizing Eye AF for Wide-Aperture Success
- Access the Autofocus Settings: Dive into your camera’s AF menu or custom function set to find the specific Eye AF or Subject Detection options. Ensure it is set to “Human.”
- Assign Eye AF to a Custom Button: For instant access, map the Eye AF activation to a function (Fn) or back button (AF-ON). This allows you to engage the hyper-precise tracking instantly without taking your eye from the viewfinder.
- Enable Focus Priority Switching: Check if your camera allows you to quickly switch between the left and right eye. Assign this to a joystick or another button. This gives you creative control for off-center compositions.
- Set Tracking Sensitivity: Adjust the AF tracking sensitivity. For a predictable movement like a processional, a “locked-on” setting is best. For erratic dancing, a more “responsive” setting helps the camera reacquire focus faster.
- Test in a Live Environment: Before the wedding day, practice on friends or family walking towards you. Observe how the focus box locks on and tracks the eye in the EVF, and get a feel for your custom button layout until it becomes muscle memory.
85mm f/1.4 or 135mm f/2: How to Anticipate and Capture Candid Wedding Moments Before They Vanish Forever
Choosing a lens for candid moments is about more than just focal length; it’s about choosing your working distance and presence. The 85mm and 135mm primes are the two undisputed kings for portraiture and candid work, but they offer fundamentally different approaches to capturing emotion. The 85mm puts you on the edge of the conversation, close enough to feel the energy of the moment. The 135mm makes you a nearly invisible observer, capturing unguarded reactions from a distance. Neither is “better,” but each serves a distinct narrative purpose in your wedding day shot list.
Anticipating a moment is key. With an 85mm, you’re looking for intimate interactions: the bride sharing a laugh with her mother, the groom whispering to his best man. You are a participant-observer. With a 135mm, you’re hunting for purer, more documentary moments: the father of the bride watching the first dance from across the room, a guest’s unfiltered, tearful reaction during the vows. Your distance ensures the moment remains completely untainted by your presence. The choice of lens dictates the type of moment you are able to capture.
Case Study: A Photographer’s Choice Between Speed and Compression
In a real-world debate, a wedding photographer weighing the Canon 85mm f/1.2 against a 135mm f/2 ultimately leaned toward the 85mm. The deciding factors were the extra stop of light-gathering speed, crucial for dimly lit venues, and the more versatile focal length. They noted that while the 135mm is excellent, its slower aperture and longer focal length demand a higher shutter speed to prevent camera shake. The photographer described the bokeh from the 85mm f/1.2 as “ethereal,” making it the winning choice for their primary candid lens.
This decision often comes down to a trade-off between low-light capability, working distance, and the degree of background compression you desire. The following table breaks down the core differences to help you decide which tool is right for the specific story you want to tell.
The following table, based on an in-depth lens comparison, outlines the strengths of each focal length for capturing candid wedding moments.
| Criteria | 85mm | 135mm |
|---|---|---|
| Subject Separation | Strong, while still allowing you to capture surrounding scene | Even stronger; background nearly disappears at wide apertures |
| Working Distance | Moderate — stay part of the conversation’s energy | Far — near-invisible presence, ideal for unguarded moments |
| Low-Light Speed | Faster max apertures common (f/1.2–f/1.4) | Typically one stop slower (f/1.8–f/2) |
| Best Use Case | Intimate portraits, close interactions | Fully candid, documentary-style reactions |
The Bokeh Obsession That Loses All Environmental Context in Wedding Venue Photography
The pursuit of “creamy bokeh” can become an addiction. Armed with an f/1.2 lens, it’s tempting to shoot everything wide open, transforming every background into an abstract watercolor. While this is powerful for isolating emotion in a close-up, it can be a storytelling disaster when overused. A wedding doesn’t happen in a vacuum; it happens in a specific place chosen by the couple for its character, history, and beauty. When a photographer’s obsession with shallow focus obliterates the venue in every shot, they are erasing a key character from the story.
This is where a cinematographer’s mindset is crucial. A filmmaker uses an “establishing shot” to set the scene before moving in for close-ups. As a photographer, you must do the same. The image must answer not only “who” but also “where.” Is it a grand ballroom with historic architecture? A rustic barn with warm, wooden textures? A modern gallery with clean lines? This environmental context adds a vital layer to the narrative. The trick is to balance context with separation. You don’t need edge-to-edge sharpness (f/8), but you also don’t need a paper-thin depth of field (f/1.2). Sometimes, the perfect aperture is f/4 or f/5.6.
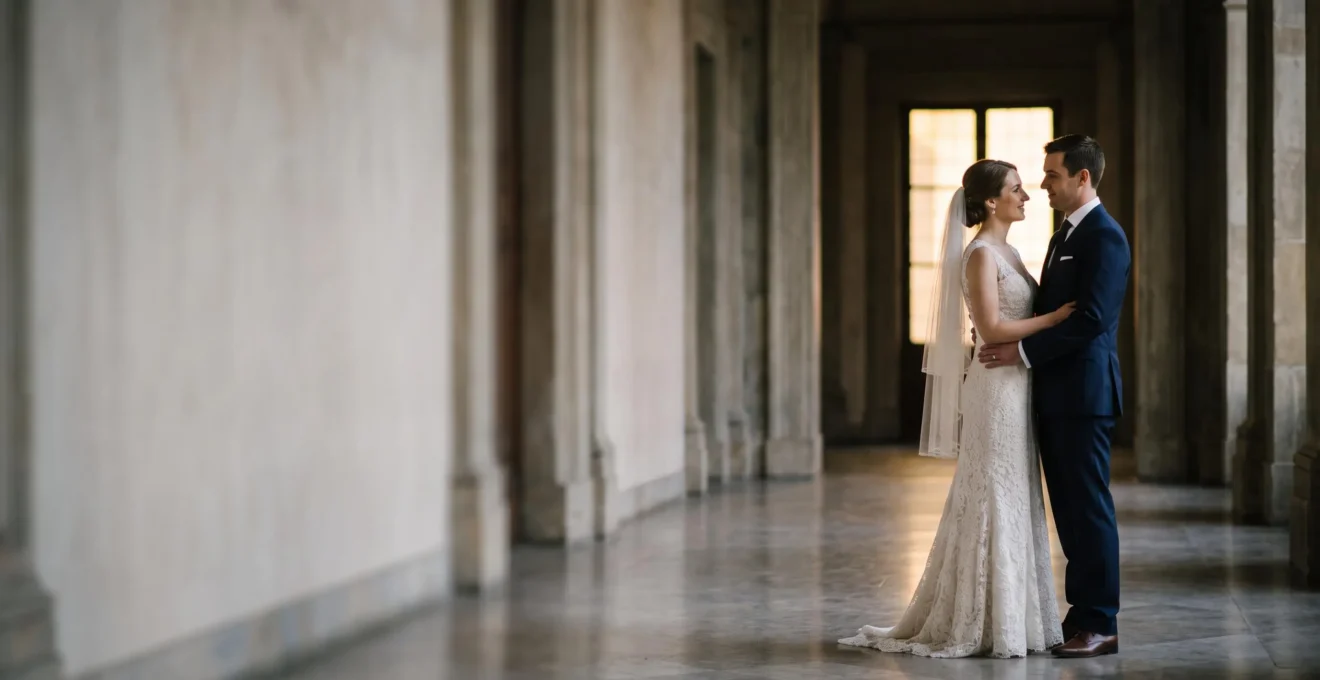
This environmental portrait shows how to retain context while still creating a cinematic feel. The background is soft and unobtrusive, yet the architectural elements remain recognizable, anchoring the couple in their chosen location.
The key is to make a conscious choice. Before raising the camera, ask yourself: “Is the background a distraction or is it part of the story?” If it’s a messy getting-ready room, obliterate it. But if it’s the sweeping vineyard where the proposal happened, you must preserve it. This involves not only stopping down your aperture but also choosing the right lens for the job. A wider lens, like a 35mm, is inherently better for environmental storytelling, while a longer lens, like an 85mm, is designed for subject isolation. Matching the tool and the setting to your narrative goal is the mark of a true visual storyteller.
When to Shoot Cinematic Shallow Focus and When to Choose Documentary Depth During Wedding Coverage
A complete wedding album is a symphony of different narrative beats. It needs quiet, intimate solos as well as grand, sweeping ensemble pieces. A photographer who shoots the entire day with a single approach—be it all shallow focus or all deep focus—creates a monotonous, one-note story. The art lies in knowing when to deploy each technique. This requires creating a mental framework: are you capturing a “cinematic moment” or a “documentary moment”?
A cinematic moment is about subjective emotion. It’s a close-up on the bride’s face during the vows, the exchange of rings, or a quiet, tearful hug. Here, a shallow depth of field is your best tool. Your goal is to isolate this peak emotion, removing all other distractions and pulling the viewer directly into the subject’s personal experience. These are the “hero” shots that often become the most cherished portraits.
A documentary moment, on the other hand, is about objective context. It’s the wide shot of the ceremony showing all the guests, the chaos and energy of the dance floor, or the grand exit through a tunnel of sparklers. Here, a deeper depth of field (f/4 to f/8) is essential. Your goal is to preserve the sense of community, scale, and environment. As noted by the Adorama Learning Center, couples desire a mix of styles: they want “classic portraits, candid moments, and documentary-style storytelling to capture the day.” The skill is in blending them seamlessly. For example, during the reception, you can use a slow shutter speed with a deep aperture to capture the motion blur of the dance floor (documentary), then quickly switch to a wide-open prime to isolate a single couple sharing a slow dance (cinematic).
This strategic variation creates a dynamic and engaging album. It provides an emotional rhythm, pulling the viewer in close for intimate feelings and then pulling back to show the larger celebration. It’s about building a visual language for the day, where your choice of aperture is as deliberate as a writer’s choice of words.
Why Some Lenses Create Smooth Creamy Bokeh While Others Produce Harsh Distracting Background Blur
Not all blur is created equal. The term “bokeh” doesn’t just refer to the blur itself, but to its aesthetic quality. Some lenses produce a smooth, creamy, buttery out-of-focus rendering that makes subjects pop beautifully. Others create “nervous” or “busy” bokeh, with harsh edges on specular highlights and distracting double lines, which can pull attention away from the subject. This difference isn’t accidental; it’s a direct result of a lens’s optical design, particularly the construction of its aperture diaphragm.
The two key factors are the number of aperture blades and whether those blades are straight or rounded. As a general rule, more blades create a more circular opening, especially when the lens is stopped down from its widest setting. A circular aperture produces round, soft out-of-focus highlights. A lens with fewer, straight blades will produce polygonal (e.g., hexagonal or octagonal) highlights that can look geometric and distracting. A study in Improve Photography found that the lenses that produce the best bokeh had 9 rounded blades, while the worst performers had as few as 5 straight blades.
The shape of the blades matters just as much. Rounded blades help maintain a circular aperture even when stopped down, leading to consistently pleasing bokeh across a range of f-stops. As Canon notes, “A lens with nine rounded blades, like the Canon RF 85mm f/1.2L, creates beautifully circular highlights even when stopped down a stop or two from wide open.” This is why premium portrait lenses often advertise their high blade count and rounded design.
Understanding this helps you choose your tools more deliberately. When you are looking for the absolute creamiest background for a key portrait, you’ll reach for the prime lens with the highest number of rounded aperture blades. This technical knowledge moves you beyond simply wanting “blur” and towards sculpting the specific character of the blur to match the mood you want to create. The quality of your bokeh is a subtle but powerful element of your cinematic toolkit.
How to Capture Intimate Emotional Moments With 135mm+ Lenses Without Feeling Distant or Detached
The 135mm lens is a magical tool for portraits, renowned for its incredible subject-background compression and beautiful bokeh. However, many photographers hesitate to use it for candid wedding work, fearing the long working distance will create a sense of detachment. The worry is that you become a sniper, disconnected from the emotion you’re trying to capture. This is a valid concern, but it can be overcome by understanding that a 135mm lens doesn’t create distance—it leverages distance to capture a different, often more pure, form of intimacy.
The key is that your subjects don’t know you’re there. From 20 or 30 feet away, you are essentially invisible. This invisibility is your greatest asset. It allows you to capture completely unguarded moments. The laughter is more genuine, the expressions more honest. You are not capturing their reaction *to you*; you are capturing their reaction to the moment itself. This is a powerful form of intimacy, one that feels discovered rather than directed. As one photographer noted after transitioning from an 85mm, the initial fear of being “disconnected from the action” was replaced by excitement for the unique candids a long telephoto prime could deliver.
Furthermore, the intense compression of a 135mm lens has a unique psychological effect. It visually pulls the background closer to the subject, wrapping them in their environment and creating a very tight, focused world within the frame. This effect, combined with the extremely shallow depth of field, makes the captured moment feel incredibly private and self-contained. A forum member on DPReview described this perfectly:
To me 135 is kind of a specialist lens, mostly for outdoor use when you want maximum compression and bokeh, there won’t be much of the background left to see, at wider apertures.
– DPReview Forum Member, 85 or 135? – DPReview Forums
So, instead of seeing the 135mm as a lens that pushes you away, see it as a tool that grants you access to moments you could never capture up close. It’s not for every situation, but for capturing those truly stolen, intimate glances from afar, it is simply unparalleled.
Key Takeaways
- Cinematic depth is a narrative choice, not just a technical setting. Use it to direct the viewer’s emotion.
- Mastering your camera’s Eye AF is the non-negotiable key to confidently shooting at apertures like f/1.4 and f/1.2.
- Balance subject isolation with environmental context. Sometimes, stopping down to f/4 or f/5.6 tells a better story than shooting wide open.
How to Create Dreamy Bokeh Background Separation That Makes Subjects Pop in Wedding Portraits
Creating that three-dimensional “pop” where the subject seems to leap off the screen is the ultimate goal of cinematic portraiture. It’s the result of a deliberate combination of four key factors: aperture, focal length, subject-to-background distance, and the optical quality of your lens. Mastering this effect means moving beyond simply setting your lens to its widest aperture and hoping for the best. It requires you to actively orchestrate the scene to maximize separation.
First and foremost is the physical space. As Beverly Boy Productions points out, “By placing your subject well in front of the background, you can intensify the blur and isolate them within the frame.” This is the most crucial and often overlooked element. Even with an f/1.2 lens, if your subject is standing a foot in front of a brick wall, the separation will be minimal. You must actively scout for locations where you can put significant distance—ideally 20 feet or more—between your couple and whatever is behind them. This gives the background space to fall into a soft, pleasant blur.
Next, consider the background itself. You’re not just looking for distance; you’re looking for texture and light. A plain, flat wall will create a boring, uniform blur. A background with depth and small points of light—like foliage with sunlight filtering through, or distant city lights at dusk—will transform into a dynamic, beautiful bokeh. These points of light become the soft, circular highlights that give the background a magical quality. Your job is to position your subject in front of a background that has the potential to become beautiful when rendered out of focus.
Finally, it comes back to your tools. Longer focal lengths (like 135mm) naturally compress the background and enhance separation. Prime lenses, which are optically simpler than zooms, typically produce a more pleasing bokeh quality. And as we’ve discussed, lenses with a higher number of rounded aperture blades will create the creamiest, most circular bokeh. By combining these elements—a fast, high-quality prime lens, maximum subject-to-background distance, and a textured, well-lit background—you are no longer just taking a picture; you are engineering a cinematic moment.
Now that you understand the principles, the next step is to put them into practice. Start by dedicating 15 minutes of your next engagement session to pure experimentation. Choose your fastest prime lens, put distance between the couple and the background, and consciously shoot between f/1.2 and f/1.8, trusting your Eye AF to do the heavy lifting. The only way to master this is to build the muscle memory and creative confidence that comes from experience.