
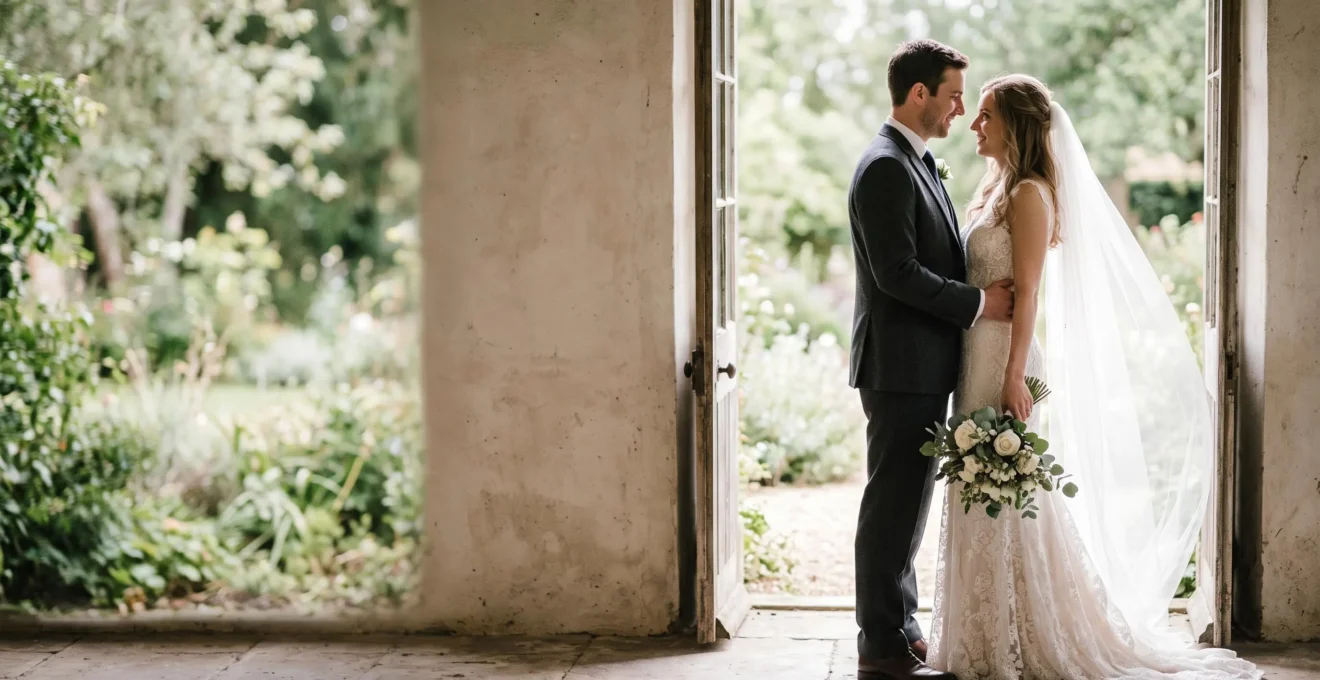
Creating truly soft portraits isn’t about blurring skin, but about mastering the quality of light before it ever touches your subject or your lens.
- Soft light works by scattering beneath the skin to create a natural glow, while hard light creates harsh surface reflections that emphasize texture.
- The ‘creaminess’ of the background (bokeh) is a distinct optical property of the lens, entirely separate from the quality of the light on your subject.
Recommendation: Prioritize finding or creating one large, diffused light source and learn to shape it with both reflectors (to add light) and absorbers (to deepen shadows).
As a wedding photographer, you’ve likely faced this frustrating moment: a portrait that is technically perfect—sharp, well-exposed, correctly composed—but feels emotionally flat, harsh, or simply unflattering. The temptation is to look for a quick fix, chasing common advice like “always shoot at golden hour” or buying a faster lens, believing that a shallow depth of field is the only key to softness. Others turn to post-production, applying presets and filters that promise a “soft and airy” look but often deliver plastic, artificial-looking skin.
These approaches treat softness as an effect to be applied, rather than a quality to be cultivated. The truth is that genuinely flattering portraits are born from a much deeper place. They emerge from an intentional understanding of light itself: its physical properties, how it interacts with human skin, how it is shaped by modifiers and lenses, and how it is finally rendered in a digital file. This isn’t about a simple checklist; it’s about shifting your perspective from merely capturing light to consciously sculpting it.
This guide moves beyond the platitudes to explore the foundational principles of soft light. We will delve into the science of why some light feels gentle and other light feels severe. We will explore practical techniques for creating and controlling light, both natural and artificial. Finally, we will examine how choices made in-camera and in post-production contribute to an aesthetic of authentic, effortless beauty that makes every subject look their absolute best.
To help you navigate these concepts, this article is structured to build your understanding from the foundational physics of light to the final artistic application. Here is what we will cover.
Summary: A Deep Dive into Creating Flattering Portrait Light
- Why Some Portrait Light Feels Soft and Flattering While Other Light Feels Harsh and Unflattering
- How to Create Soft Wrap-Around Portrait Light Using Large Diffusion Modifiers
- Soft-Focus Lens Filters or Digital Post-Processing: Which Creates Better Soft Portrait Aesthetics
- The Over-Softening Mistake That Makes Portraits Look Plastic and Over-Processed
- Which Subjects Benefit Most From Soft Portrait Treatment and Which Prefer Sharper Rendering
- Why Indirect Window Light Creates Better Bridal Portraits Than Direct Sunlight in 90% of Situations
- Why Some Lenses Create Smooth Creamy Bokeh While Others Produce Harsh Distracting Background Blur
- How to Master Ambient Light Reading for Wedding Photography Without Relying on Flash
Why Some Portrait Light Feels Soft and Flattering While Other Light Feels Harsh and Unflattering
The difference between “soft” and “hard” light is not about brightness but about the quality of shadow transitions. Hard light, from a small or distant source like the midday sun, creates sharp, well-defined shadows that accentuate every fine line and texture. Soft light, from a large or diffused source like an overcast sky, creates gradual, gentle shadows with soft edges. This fundamental difference is rooted in physics and human perception. When light hits skin, it doesn’t just bounce off; a significant portion enters the top layers and scatters. This phenomenon is known as subsurface scattering.
Soft, diffused light enhances this effect. In fact, research into how skin interacts with light shows that approximately 94% of light is scattered beneath the skin’s surface, while only about 6% reflects directly off it. This scattering is what gives skin its characteristic soft glow under flattering light. Hard light, by contrast, creates strong specular reflections on the surface, overwhelming the subtle glow from within and highlighting imperfections.
As the visual comparison above demonstrates, the choice of light quality dramatically alters the perception of the subject. The harsh light creates strong contrast and emphasizes texture, while the soft light sculpts the face gently and produces a more pleasing, radiant look. This perceptual difference is key to creating universally flattering portraits.
The Fstoppers Editorial Team explains this connection between light physics and aesthetic preference perfectly:
The reason soft light is considered flattering is because it does not reveal fine texture and contrasts as much as hard light, meaning blemishes in skin are not as prominent and shadows have finer, more gradual transitions.
– Fstoppers Editorial Team, Fstoppers – How to Create Very Soft and Flattering Light for Portrait Photos
Ultimately, understanding this principle is the first step toward intentionally choosing light that serves your subject, rather than simply accepting the light that’s available. By grasping the “why” behind soft light, you gain the power to create it anywhere.
How to Create Soft Wrap-Around Portrait Light Using Large Diffusion Modifiers
The core principle for creating soft light is simple: the larger the light source is relative to your subject, the softer the light will be. A small, bare flash is a hard light source. That same flash fired through a large 60-inch octabox becomes a huge, soft source. At a wedding, you can apply this principle by using large diffusers, reflectors, or even natural features like a white wall to modify and soften your light.
However, creating beautiful light isn’t just about softness; it’s also about control and dimension. Sometimes, a large, soft light source can be *too* flat, wrapping around the subject so much that it eliminates all shadows and makes the face appear dimensionless. This is where a more advanced technique, negative fill, becomes invaluable. Instead of adding light with a white reflector, negative fill uses a black surface (like the black side of a 5-in-1 reflector or a V-flat) to absorb stray light and deepen shadows on one side of the subject. As explained in a guide from Beverly Boy Productions, negative fill is a lighting technique that involves using black materials to absorb light and enhance contrast, adding shape and dimension back into a softly lit scene.
Using a black flag or V-flat allows you to carve shadows back into the portrait, creating a more sculpted, dimensional look often seen in fine art and editorial photography. Here are the basic steps for using this technique:
- Open the V-flat or black reflector so it stands on its own near the subject.
- Position the black side to face the area where you want to remove light and deepen shadows (typically on the opposite side of your main light source).
- Move the flag closer to the subject for darker, more defined shadows and increased contrast.
- Move the flag farther away from the subject to open up the shadows, allowing more ambient light to reflect back and soften the effect.
By learning to both soften light with diffusion and shape it with negative fill, you gain complete creative control. You can craft light that is simultaneously gentle on the skin and rich with dimensional character, elevating your portraits beyond a simple, flatly lit snapshot.
Soft-Focus Lens Filters or Digital Post-Processing: Which Creates Better Soft Portrait Aesthetics
Once you’ve mastered your lighting, you might want to add an extra layer of ethereal softness. This can be achieved either optically with lens filters or digitally in post-production, and each method has a distinct character. The key difference is *when* the effect is applied: filters alter the light before it hits the sensor, while digital tools manipulate the data after it has already been captured.
Optical soft-focus filters, like a Tiffen Black Pro-Mist or Glimmerglass, work by scattering light as it enters the lens. This physically alters the image by lowering overall contrast and, most importantly, causing highlights to “bloom” or glow. This blooming effect is organic and difficult to replicate perfectly with software because it’s a result of real-world physics. The effect is baked into the RAW file, which can be both a creative commitment and a time-saver in post.
Digital post-processing offers more control and reversibility. Tools like the Clarity and Texture sliders in Adobe Lightroom, or more advanced techniques like Frequency Separation in Photoshop, allow you to selectively soften certain details. Lowering clarity reduces mid-tone contrast for a dreamy effect, while negative texture can smooth skin. However, these are emulations. They can’t truly replicate the highlight bloom of an optical filter and, if used improperly, can lead to a processed, unnatural look. A common mistake is to create an image that is simply blurry rather than intentionally soft.
So, which is better? Neither. They are different tools for different artistic intents. An optical filter provides a romantic, filmic glow that feels authentic and holistic. Digital tools provide precise, targeted control to refine an image. Many high-end photographers use a subtle optical filter on-set to create a beautiful base image and then use digital tools for minor, targeted retouching. Understanding both allows you to choose the right method to achieve your specific creative vision for softness.
The Over-Softening Mistake That Makes Portraits Look Plastic and Over-Processed
In the quest for “perfect” skin, one of the most common mistakes photographers make is over-softening. Whether using aggressive presets, abusing the Clarity and Dehaze sliders, or improperly applying frequency separation, the result is the same: skin that looks fake, waxy, and devoid of life. This “plastic look” strips the subject of their authenticity and creates a portrait that feels more like a digital illustration than a photograph.
The goal of flattering portraiture should be to create what photographers call “authentic texture.” This means reducing distracting temporary blemishes or evening out skin tone while carefully preserving the natural, essential textures that make a person look human: the fine lines around the eyes, the subtle pattern of pores, and the delicate strands of vellus hair. These details are not imperfections; they are part of the individual’s unique character. When they are completely obliterated, the portrait loses its connection to reality.
As photographer and retoucher James Abbott notes when discussing a powerful but often misused technique, the danger lies in taking things too far. He warns, “Like many Photoshop techniques, this is one that can be taken too far and in the case of frequency separation, that means fake looking ‘porcelain’ skin.” This cautionary note applies to any softening method. The key is subtlety. Your retouching should be invisible. The viewer should simply perceive the subject as looking their absolute best, without being able to pinpoint exactly why.
To avoid the over-softening trap, work at a lower opacity, use masks to apply effects selectively, and always ask yourself: “Does this enhance their natural beauty, or does it erase their humanity?” The most beautiful portraits strike a delicate balance, achieving a look that is both soft and utterly real.
Which Subjects Benefit Most From Soft Portrait Treatment and Which Prefer Sharper Rendering
While soft, flattering light is a powerful tool, it’s not the only tool. The decision to pursue a soft aesthetic versus a sharper, more textural rendering is an artistic choice that should be driven by the subject, the context, and the story you want to tell. Understanding when to use each approach is a mark of a versatile and thoughtful photographer.
Soft portrait treatments are most often sought after in genres where beauty, romance, and emotion are paramount. This includes:
- Bridal and Engagement Portraits: The classic “soft and airy” look is popular here because it evokes a sense of romance, timelessness, and delicate beauty.
- Maternity Photography: A soft, high-key treatment can create a serene, ethereal glow that beautifully complements the subject.
- Beauty and Glamour: While commercial beauty can be sharp, a softer approach is often used to create a dreamlike, flawless aesthetic.
- Portraits of Mature Subjects: Soft light is exceptionally flattering as it de-emphasizes fine lines and wrinkles, focusing instead on the subject’s expression and spirit.
Conversely, a sharper, more textural rendering can be more powerful and appropriate in other contexts. This style often uses harder light sources, higher-contrast processing, and emphasizes detail. It’s often preferred for:
- Male Portraiture: Many men prefer a more “rugged” or “character-driven” portrait, where textures like a beard, wrinkles, or skin texture are seen as features, not flaws.
- Corporate Headshots: A clean, sharp, and confident look is typically the goal. While the light should still be flattering, it’s often more directional and less diffused than in bridal work.
- Dramatic or Editorial Fashion: High contrast and sharp details can create a bold, graphic, and high-impact image that commands attention.
- Character Studies: When the goal is to tell a story of a life lived, preserving every detail and line in a person’s face can be incredibly powerful.
Ultimately, there are no rigid rules. You can create a dramatic, high-contrast bridal portrait or a soft, gentle headshot. The key is to make an intentional choice. Before you even lift the camera, consider your subject and your goal. Are you aiming to create a romantic dream or a powerful statement of character? Your answer will guide every decision you make about light, lensing, and processing.
Why Indirect Window Light Creates Better Bridal Portraits Than Direct Sunlight in 90% of Situations
On a wedding day, one of the most powerful and readily available tools for creating soft, beautiful light is a simple window. However, not all window light is created equal. The critical distinction is between direct and indirect light. Direct sunlight streaming through a window is a hard, high-contrast light source. It creates harsh shadows, bright hotspots, and will cause your subject to squint. It’s challenging to work with and generally unflattering for portraiture.
Indirect window light, on the other hand, is a photographer’s dream. This occurs when you use a window that is not in the direct path of the sun. The window acts as a giant, natural softbox. The light from the sky is already diffused, and the window itself becomes the source, producing a broad, soft, and directional light that wraps beautifully around a subject. This is why a north-facing window (in the northern hemisphere) is so prized by painters and photographers—it provides consistent, soft light all day long.
This principle is identical to why photographers love an overcast day. As the team at Wanderlust Videos notes, “Overcast skies – Cloud cover diffuses sunlight into a soft, even glow. It’s flattering for skin tones and minimizes harsh contrasts.” A window with indirect light is your personal, indoor overcast sky. You can position the bride near the window, facing towards it for a clean, bright look, or have her stand parallel to it for more dramatic, sculpted shadows (a classic Rembrandt or loop lighting pattern).
During bridal prep, instead of placing the bride in a patch of direct sun, scout the room for the largest window that offers soft, indirect light. This simple choice will do more to create a stunning, flattering portrait than any piece of gear. It allows you to capture the bride in a pool of gentle, radiant light that feels both natural and professionally crafted.
Why Some Lenses Create Smooth Creamy Bokeh While Others Produce Harsh Distracting Background Blur
Many photographers associate a “soft look” solely with a blurry background, a quality known as bokeh. But just like light, not all bokeh is created equal. Bokeh isn’t about the *amount* of blur, but the *quality* of that blur. Some lenses produce a smooth, creamy, buttery background that melts away, while others create a “nervous” or “busy” blur with harsh edges and distracting patterns that can detract from the subject.
This difference in character, or the lens’s optical signature, comes down to complex optical design choices made by the manufacturer. One of the primary factors is how the lens corrects for something called spherical aberration. A lens with under-corrected spherical aberration tends to produce softer-edged, creamier background blur, which is highly desirable for portraits. Conversely, a lens that is over-corrected can produce harsher-edged bokeh. The shape of the aperture blades also plays a huge role; more rounded blades will create smoother, rounder out-of-focus highlights.
As the team at Fstoppers clarifies, it’s a nuanced topic: “Bokeh isn’t blur amount—it’s blur quality. Learn how lens design, aperture shape, and background choice create smooth, creamy bokeh versus nervous, distracting blur.” This distinction is critical for photographers who want to make intentional choices about their gear.
The character of a lens’s bokeh is a direct result of its optical formula. An analysis of lens design and bokeh character shows how different correction philosophies lead to vastly different results.
| Lens Type / Design | Spherical Aberration Correction | Bokeh Character |
|---|---|---|
| Under-corrected classic optics (e.g. Sigma 50/1.4, Tamron 60/2 macro) | Under-corrected | Creamy, soft-edged background blur; harder-edged foreground blur |
| Over-corrected modern optics (e.g. Nikon 50/1.4G, Nikon 85/1.8D) | Over-corrected | Pronounced-edge background bokeh; creamier foreground blur |
| Apodization/STF lenses (e.g. Sony 100mm f/2.8 STF) | Neutralized via apodization element | Extremely smooth, gradual falloff resembling gaussian blur |
Understanding this doesn’t mean you need to memorize optical diagrams. It means recognizing that your lens is an artistic tool with its own voice. When choosing a lens for portraiture, look beyond just the maximum aperture. Look at sample images, pay attention to the quality of the out-of-focus areas, and choose a lens whose optical signature complements the soft, flattering aesthetic you wish to create.
Key takeaways
- True portrait softness comes from the quality and size of the light source, not just from blurring the background or skin.
- Understanding the science of how light interacts with skin (subsurface scattering) is the key to creating a natural, radiant glow.
- Master both adding light with reflectors and, more importantly, subtracting light with negative fill to create dimension and shape.
How to Master Ambient Light Reading for Wedding Photography Without Relying on Flash
While modifiers and flash are powerful tools, the true master photographer is one who can walk into any room and create a stunning portrait using only the available ambient light. Mastering this skill not only makes you faster and more adaptable on a hectic wedding day but also helps you create images that feel more authentic and cinematic. It requires a shift in mindset: from creating light to *finding* and *shaping* it.
The first step is to develop your “light-reading” eyes. When you enter a venue, don’t look for a place to set up your flash; look for the light. Where are the windows? What direction is the light coming from? Are there lamps, chandeliers, or uplighting? Each of these is a potential source you can use. Don’t just look for soft light; look for interesting light. As noted by Expert Photography, a more dynamic image can often be created by not having the light source directly in front of your subject. They suggest that “side lighting will create more interesting shadows and is less boring than front lighting.” This creates depth, drama, and a sense of three-dimensionality.
Once you’ve identified your potential light sources, you can start positioning your subjects relative to them to achieve different effects. Have them face a window for a bright, clean look. Position them at a 45-degree angle for classic loop or Rembrandt lighting. Or, place them with their back to the light for a beautiful rim light or silhouette. The possibilities are endless when you start thinking of the entire environment as your studio.
Your action plan: Practical Ambient Light Techniques
- Identify all ambient light sources in the venue, such as window light, lamps, or architectural lighting, before you begin setting up a shot.
- Experiment with different angles by moving your subject and yourself relative to the ambient source to capture unique shadows and dimension.
- For backlit scenes, where the light is behind your couple, consider using a narrower aperture (a higher f-stop number) to keep them in sharp focus and create a beautiful background blur.
- On crowded or low-light dance floors, learn to use the DJ’s overhead or moving lights to your advantage, timing your shots to capture key moments when they are highlighted.
By actively practicing these techniques, you’ll become less reliant on your flash and more confident in your ability to create beautiful, naturally-lit images in any situation. It is this mastery of ambient light that truly separates the proficient technician from the versatile artist.
Start applying these principles today by observing the light around you, and you will transform your portraits from simple captures into timeless works of art.